
With healthy soil, you will have a flourishing garden in no time. No matter what you are planting, nutrient-rich soil is a need for every garden. Using a garden tiller to prepare the soil before planting your garden is one of the simplest methods to do it.
We give you tips on garden tillers and the different types to be aware of.
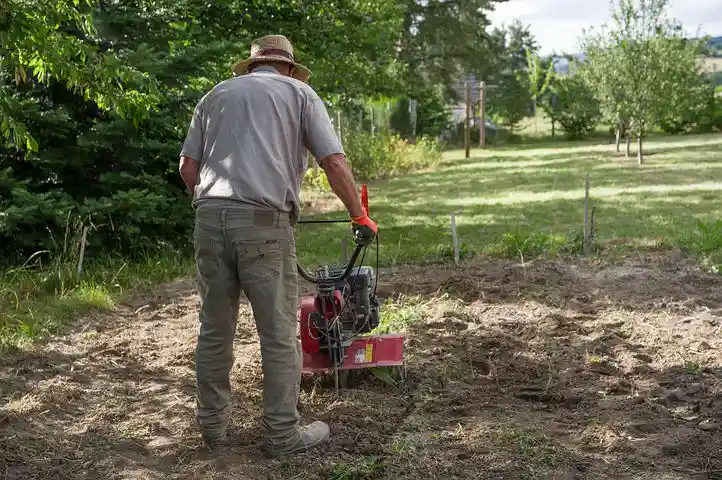
The Function Of A Garden Tiller
THIS POST MAY CONTAIN AFFILIATE LINKS. As an Amazon Associate, I earn from qualifying purchases. PLEASE READ MY DISCLOSURE FOR MORE INFO.
To prepare the ground for planting, garden tillers may perform a range of tasks. A garden tiller may be used for weeding, hoeing, plowing, and crumbling soil. Breaking the soil into tiny pieces improves aeration and prevents weeds from sprouting, which is why garden tillers are so important.
To aid in the development of crop roots, tillers remove the topsoil, loosening the ground underneath it.
Also Read: The 5 Best Indoor Garden Systems (Reviewed And Compared)
Types Of Garden Tillers
Garden tillers are available in a number of sizes to accommodate a wide range of gardens. A rear-tine option is the most powerful sort of lawn tiller. A gas engine and a breadth of 12 to 24 inches are common features of these tillers.
Ideal for vast gardens or for fast-breaking up soil that has never been tilled; they may also be used for smaller gardens.
Smaller gas engines power front-tine garden tillers, which are available in widths ranging from 12 to 36 inches. Front-tine tillers are good for established gardens since they lack the power of rear-tine tillers.
A cultivator is your final resort. Gas or electric power can be used to propel this tiniest of options. In order to stir the soil near existing plants and eradicate weeds, cultivators have a narrow breadth.
Also read: How Compost Bins Work and Benefits of Using One
Front-Line Tillers
The tines of front-tine tillers are situated in the front of the machine, which explains the name. The back wheels of these tillers make it easier to move about. Since they are cheaper and are better suited to breaking smaller sections of new ground, front-tine tillers are ideal for those with smaller gardens.
While front-tine tillers may break fresh ground, rear-tine tillers are better suited for this task. Front-tine tillers have a propensity to hop over the ground rather than burrowing into the soil while breaking new ground. If you use a front-tine tiller to break ground, expect a choppy ride and a lurching action.
Rear wheels on many front-tine tillers make it easier to move the tiller to the appropriate area. When the tines of a front-tine tiller grasp dirt, they move the machine forward.
As a result, you will have to use some physical effort in order to drive the tines into the ground while simultaneously holding the machine at a safe distance. This keeps the tiller from going forward on its own. Wait until you have reached the required depth of tilling with the tiller before moving on.
Also read: Growing Indoor Microgreens DIY (Easy and Cheap)
Rear-Line Tillers
With their rear-mounted tines and bigger motors, rear-tine tillers are more costly and better suited for large-scale projects. Rear-tine tillers have the advantage of being propelled forward by drive wheels, making it simple for the operator to regulate the tilling pace.
Depending on the task, the tines of these tillers may be switched between counter-rotating (CTR) and standard-rotating (STR).
Counter-rotation is better for breaking fresh ground than standard rotation for mixing in the dirt. Tilling using rear-tine tillers is more stable because of their higher weight. Those that have vast gardens or are planning to break new ground will benefit greatly from these tillers.
When the engine is not operating, rear-tine tillers are difficult to manage because of their large weight. To get it to where you want it to till, you’ll probably have to start it and elevate the rear.
Important Tips To Consider

Tilling should be done in long, straight lines, similar to mowing the lawn. Make further runs through your garden by tilling perpendicularly to the initial one you made. Soil compaction rather than aeration might result from overworking soil, thus be careful not to do so.
Also read: Best Mason Bee House DIY Steps | Avoid This
Effective Time
The optimal times to use a garden tiller are in the fall and spring. A few crucial points to bear in mind, no matter when you utilize it. Using a tiller when the land is wet might result in enormous clumps of compact dirt after it dries, so you should avoid doing so at all costs.
Tilling the soil after rain should be delayed for one or two days for optimal results. A few days before you begin tilling, irrigate the soil with a hose or sprinklers so that it is simpler to work with. Squeeze a handful of soil to see if it is sufficiently damp for tilling. It’s alright if the dirt collapses.
Soil Preparation
Soil preparation is necessary before you begin using the garden tiller. Any big stones should be removed from a newly planted garden.
You should also check with your local utility company to ensure that the area where you intend to plant a garden does not include any underground utility wires.
All that is required for existing gardens is a simple path and the removal of any particularly dense weeds. Even the tiniest weeds in the soil are no match for the garden tiller.
Also read: Growing Vegetables Indoors For Beginners (Your Complete Guide)
Using The Garden Tiller Properly
Be careful not to overdo it while using the lawn tiller on your first attempt. Do two passes in various directions instead of squeezing the machine too hard if the ground is hard or has never been tilled previously. Use the depth regulator to fine-tune the depth on the initial pass.
Shallow settings work best in hard, compacted soil. Start with the medium setting if the ground is softer.
To get the lawn tiller running, you don’t need to exert a lot of force on the handle. Keeping the machine moving in a straight line is all you want. You may also adjust the handlebars slightly to the side to improve forward movement. Make further passes until the dirt has been broken down to a depth of 8 inches or so.
Safety Precautions
It’s a large, heavy piece of farm equipment with razor-sharp blades. As a result, operating one necessitates that you exercise prudence and safety measures.
In order to ensure that you understand the controls and safety features, read the service manual. As a last precaution, make sure you’re dressed safely, including sturdy shoes, long undergarments and sleeves, and safety goggles.
Using a garden tiller to break up the soil before planting is a useful piece of gardening equipment. These guidelines will help you operate a garden tiller correctly while preparing your soil for growing.
How To Use A Garden Tiller – Summary
Now that you know how to use a garden tiller, it’s time to get started on your next gardening project. Be sure to practice in an open space with plenty of room before tackling any large projects. We hope you have enjoyed this tutorial and found it helpful. Happy tilling.