
If you’re looking for ways to reduce your environmental impact, composting is a great option. Composting at home in a tumbler is easy and can be done with just a few simple items.
In this blog post, we’ll show you how to start composting in a tumbler plus give you 5 tips on how to start composting at home. We’ll cover the basics of composting, such as what materials can be composted and how to get started with a DIY compost bin. Plus, we’ll give you tips on making the process easier and more efficient.
So read on for all the information you need to start composting at home.
And be sure to find out about growing vegetables indoors for beginners as well as the best indoor garden systems. Read all my Garden articles.
- How To Start Composting In A Tumbler
- Composting Facts
- How do I start composting for beginners?
- When is compost done?
- How long does composting take?
- What can I do with the finished compost?
- Tips for maintaining your composting system and getting the most out of it
- How to avoid common composting mistakes
- Is it better to have a compost pile or bin?
- Advantages and disadvantages of composting
- FAQ:
- How To Start Composting In A Tumbler – Summary
- 10 great composing products for you:
THIS POST MAY CONTAIN AFFILIATE LINKS. As an Amazon Associate, I earn from qualifying purchases. PLEASE READ MY DISCLOSURE FOR MORE INFO.
How To Start Composting In A Tumbler
If you’re interested in composting but don’t have a lot of space or time, composting in a tumbler might be the perfect solution for you. Tumblers allow you to compost kitchen scraps and yard waste without taking up a lot of space, and they provide aeration to speed up the composting process.
Here’s everything you need to know to get started composting in a tumbler.
What You’ll Need to Compost in a Tumbler
To start composting in a tumbler, you’ll need a few supplies:
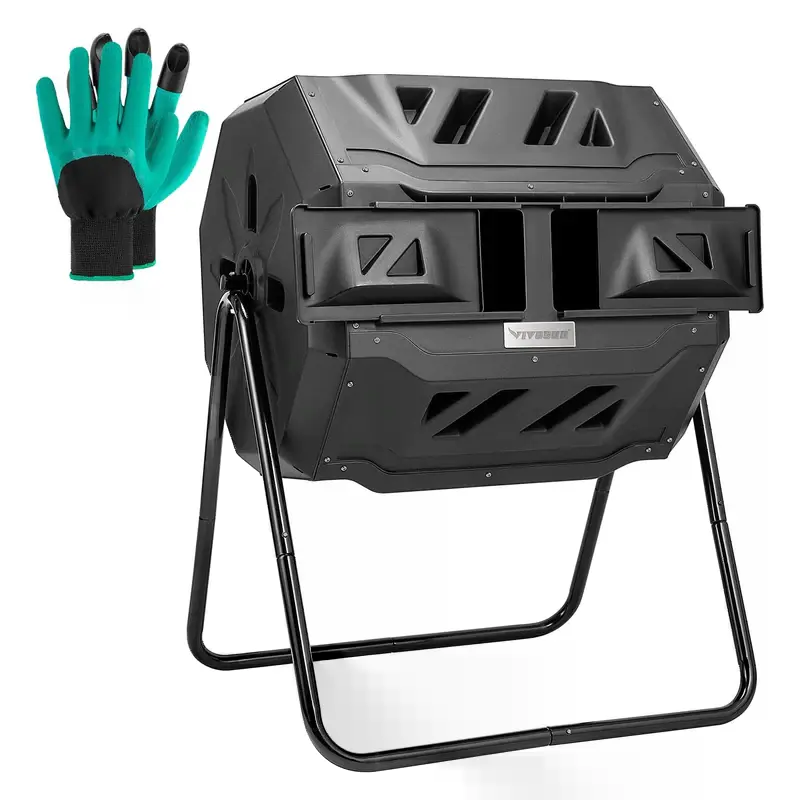
Tumbler:
Look for a tumbler that’s made of durable plastic and has good reviews. Most tumblers have handles and lids, which makes them easy to move and keep critters out.
There are many different kinds of compost tumblers on the market, but they all serve the same purpose: to make it easier for you to compost.
Some models are feature-heavy and come with things like thermometers and ventilation systems. Others are more basic, but they’ll still get the job done.
See below for my recommendations for tumblers.
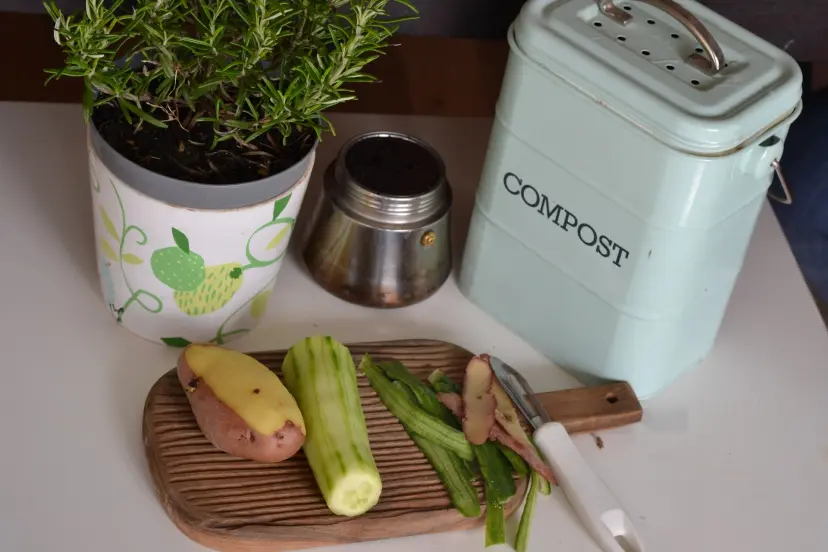
Compost bin:
You’ll need somewhere to store your kitchen scraps until they’re ready to add to the tumbler. A small lidded bin or bucket will work perfectly. See what bins to use below.
Organic matter:
This is what you’ll be adding to your tumbler to create compost. You can use kitchen scraps (fruit and vegetable peels, coffee grounds, eggshells), leaves, grass clippings, and more. Avoid adding meat, bones, dairy products, or oils to your tumbler, as these can attract pests or create unpleasant odors.
The ratio of browns to greens:
For optimal decomposition, your tumbler should contain about two parts “brown” materials (dry leaves, twigs) to one part of “green” materials (kitchen scraps, grass clippings). See more details below.
Water:
Compost needs water to break down properly, but too much water will slow down the process. Add water to your tumbler as needed; a good rule of thumb is to add enough water so that the materials are moist but not soggy.
Adding Materials to Your Tumbler
Once you’ve gathered all the necessary supplies, it’s time to start adding materials to your tumbler.
- Start by adding some brown materials like dry leaves or twigs; these will help aerate the compost and absorb excess moisture.
- Then add green materials like fruit peels or grass clippings. If you’re adding kitchen scraps, make sure they’re chopped into small pieces so they decompose more quickly.
- Add more brown materials on top of the greens, then add water until the materials are moistened but not soggy.
- Close the lid tightly and give the tumbler a few good spins so the materials are mixed together well.
Now that you know everything you need to get started composting in a tumbler, what are you waiting for? With just a few simple supplies and some kitchen scraps or yard waste, you can create nutrient-rich compost for your garden—and cut down on your household waste at the same time.
Composting Facts
Composting is a great way to reduce waste and lower your carbon footprint. According to the EPA, “Food scraps and yard waste together currently make up more than 30 percent of what we throw away and could be composted instead. Making compost keeps these materials out of landfills where they take up space and release methane, a potent greenhouse gas.”
Plus, composting at home is easy and can be done with just a few simple items. See Vivosun’s tumblers. By composting your food scraps and other organic materials, you can create a nutrient-rich soil amendment that can be used in your garden.
Composting also has other benefits, such as reducing the need for chemical fertilizers, conserving water, and improving drainage in sandy soils. Compost can also help reduce erosion and runoff from heavy rains.
So why not give composting a try and see how it can benefit you and the environment? Also read how composting bins work.
What is composting?
Composting is the process of breaking down organic matter, such as food scraps and yard waste, into a nutrient-rich soil amendment. The composting process is helped along by microorganisms, such as bacteria and fungi, which break down the organic matter into simpler compounds.
The process of composting can take anywhere from a few weeks to several months, depending on the size and type of material being composted.
The three parts that makeup composting are greens, browns, and water, and you should alternate layering these materials in your compost bin.
Greens are items such as fruit and vegetable scraps, coffee grounds, and grass clippings. These items are high in nitrogen and help to speed up the composting process.
Browns are items such as dead leaves, twigs, and shredded newspaper. These items are high in carbon and help to add structure to the compost pile.
Water is also an important part of the composting process and helps to keep the compost pile moist. Too much water, however, can drown the microorganisms that help break down the organic matter.
The pile needs a certain carbon-to-nitrogen (C:N) ratio, aeration, moisture, and temperature in order to compost properly. Try to match a brown-to-green ratio of 2 to 1.
Now that you know the basics of composting, let’s take a look at how to get started.
What materials can be composted?
Wondering what you can compost? Almost any organic material can be composted, including food scraps, yard waste, and even paper products. However, there are a few things that should not be composted, such as meat, bones, and dairy products. These items can attract pests or create unpleasant odors.
In general, composting works best with a mix of green and brown materials. Green materials are high in nitrogen and include things like grass clippings, fruit and vegetable scraps, coffee grounds, and eggshells. Brown materials are high in carbon and include things like dead leaves, twigs, and wood chips.
A good compost pile should have about equal parts of green and brown materials. You can also add other organic materials to your compost piles, such as hair, sawdust, or even eggshells.
How much space do I need to compost?
You can compost anywhere, even if you live in an apartment. If you have a small yard, you can compost in a bin or pile. If you have more space, you can build a DIY compost bin or make a compost heap.
Bins and piles should be about three feet wide and three feet tall. Heaps do not need to be as large, but should still be at least three feet wide and two feet tall.
How do I start composting for beginners?
Tell me the best way to start composting. See my 5 steps to start composting:
1. Location
The first step in composting is to find a location for your DIY bin or pile. It should be in a sunny spot and away from any buildings or trees. If you are composting in a bin, make sure it has a lid to keep critters out.
2. Add Material
Next, you need to add some compostable materials to your bin or pile. You can start with kitchen scraps, such as fruit and vegetable peels, coffee grounds, and eggshells. You can also add yard waste, such as leaves and grass clippings.
If you are using a bin, layer the materials as you add them. Alternate between a layer of green material and a layer of brown material. If you are making a compost heap, simply pile all the materials together.
How to layer a compost bin
When adding materials to your compost bin, it is important to layer them properly. This will help to ensure that the composting process occurs evenly.
The first layer should be made up of brown materials like dead leaves or twigs. These materials will provide carbon for the compost pile.
The second layer should be made up of green materials like grass clippings or fruit and vegetable scraps. These materials will provide nitrogen for the compost pile.
The third layer should be made up of soil or finished compost. This will help to introduce microorganisms into the pile, which will speed up the composting process.
You can keep repeating these layers until your DIY compost bin is full.
By following these simple tips, you can ensure that your compost bin is properly balanced and will produce finished compost in no time.
3. Water
Add water to the compost bin or heap until it is damp but not soaked. The compost should be about as wet as a wrung-out sponge. You can tell if the compost is too wet if it starts to smell bad or if there is water pooling at the bottom of the bin.
4. Aerate
Once you have added the materials and water, turn or stir the compost every few days to aerate it. This will help the composting process.
If you are using a bin, you can turn the compost with a pitchfork or compost aerator. If you are making a heap, simply turn the materials with a shovel.
After a few weeks, you should start to see compost forming at the bottom of the bin or heap.
5. Ready To Use
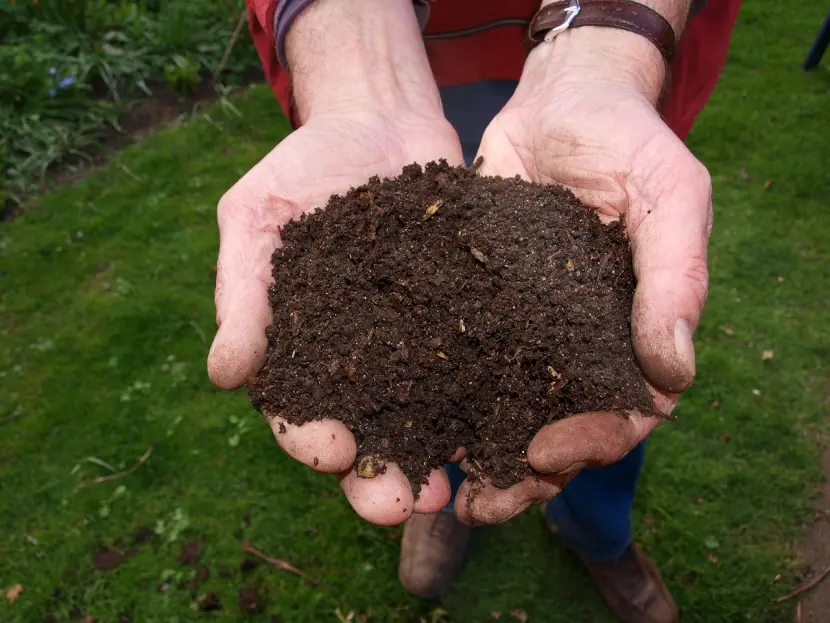
When the compost is ready, it will be dark and crumbly. It should smell earthy and have no bad odor.
You can use compost in a variety of ways, such as adding it to your garden or using it as mulch.
How to choose a composting method?
To start composting, you will need to choose either a pile, bin, or tumbler.
The composting methods are:
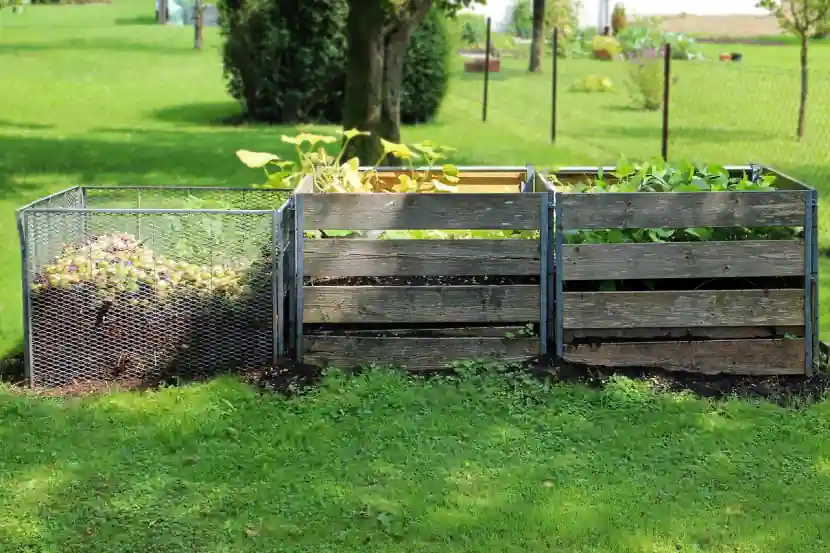
Piles
Piles are the simplest composting method. You can make a compost pile anywhere in your yard that gets sun and has good drainage.
Bins
Bins are more aesthetically pleasing than piles and can be kept indoors or outdoors. Bins also help to contain the composting materials and keep critters out.
-Check out this Hot Frog Rolling 37 Gallon Compost Bin
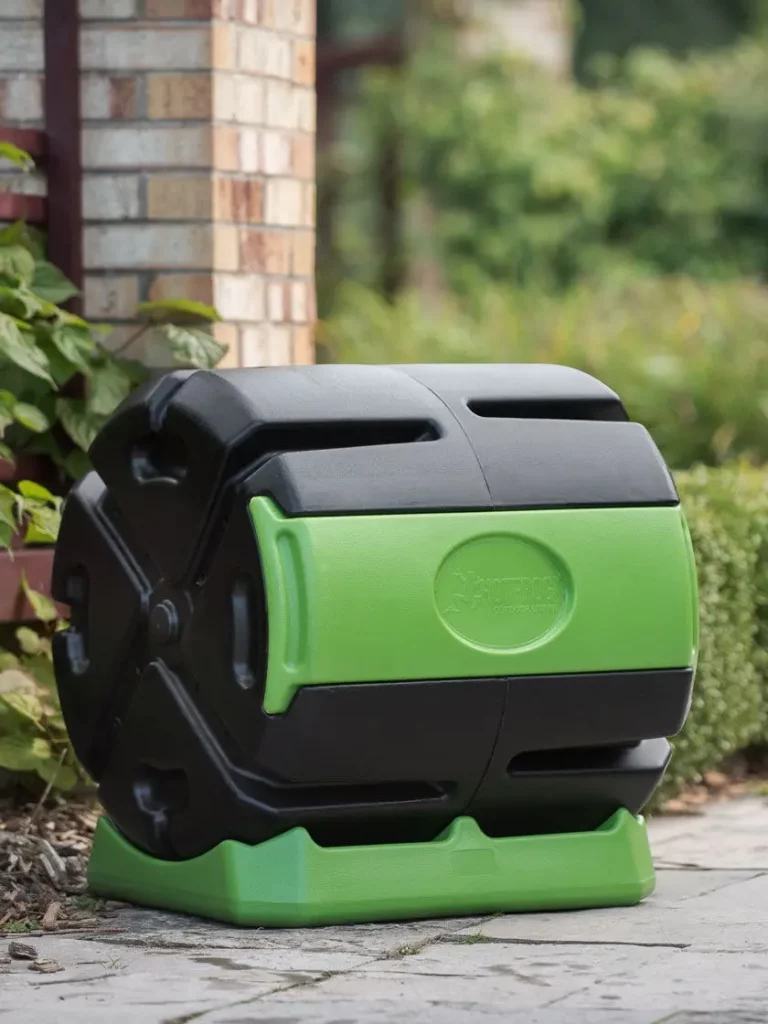
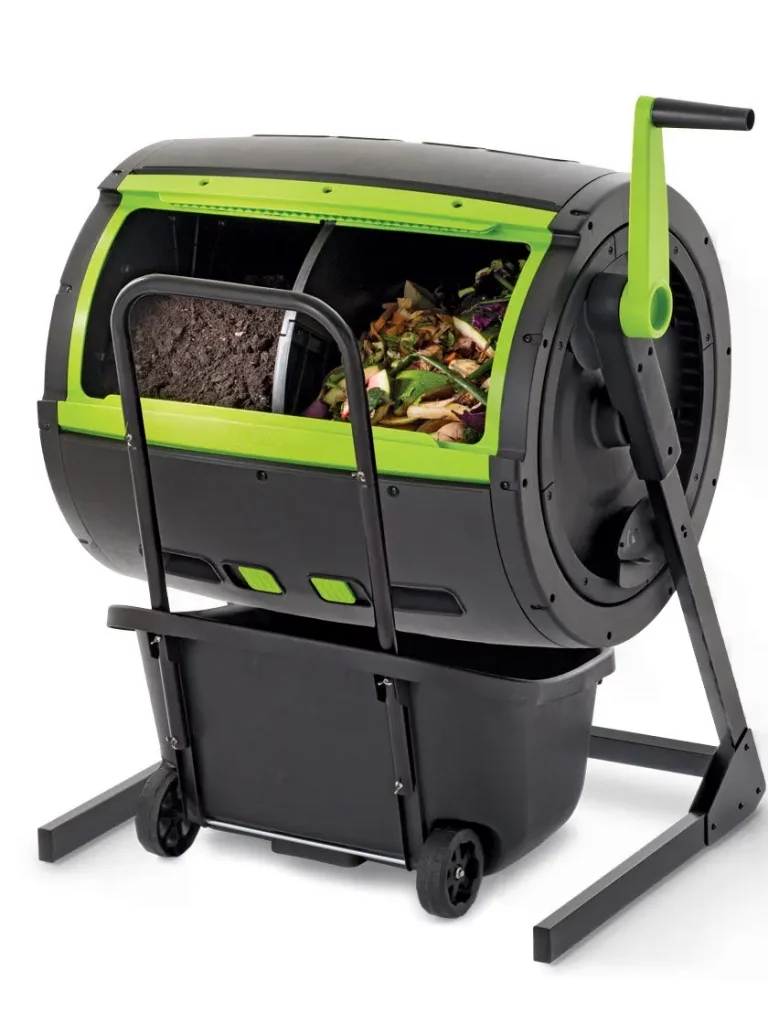
Tumblers
Tumblers are the most expensive composting option, but they are also the easiest to use. Tumblers can be rotated to aerate the compost and keep critters out.
As a beginner, you may want to start building a compost pile for a while and then move up to a quality bin or tumbler. If you need to compost indoors, choose an appropriate indoor bin.
No matter which composting method you choose, be sure to add a mix of green and brown materials and water the compost pile regularly.
Can I compost indoors?
Absolutely, there are products available to compost indoors, however, it is not as simple as just adding your compostables to a bin.
You need to make sure you have the correct bin for composting indoors. The bin should be made of materials that will allow air to flow through, such as plastic or metal. The bin should also have a tight-fitting lid to keep critters out.
You will also need to add a compost activator to your bin. This will help to speed up the composting process and keep odors at bay.
What can I add to my compost pile or bin?
Below are 10 items that can be added to your compost pile or bin.
- Fruit and Vegetable Peels
- Coffee Grounds
- Eggshells
- Grass Clippings
- Dead Leaves
- Twigs
- Wood Chips
- Hair
- Sawdust
- Paper Products
What should you not compost?
I have listed 10 items you should not add to a compost pile or bin, that is because composting is the decomposition of organic matter by microbes. These items below either attract pests, create unpleasant odors or take too long to compost.
- Meat
- Bones
- Dairy products
- Pesticides
- Chemicals
- Plants with diseases
- Invasive plants
- Cat or dog waste
- Human waste
- Yard waste from treated wood
By following these tips, you can start composting at home with ease.
When is compost done?
You can tell when compost is “done” in a few different ways. One is by smell – compost should smell earthy, not bad. Another is by texture – compost should be crumbly, not squishy.
You can also tell when compost is ready to use by the presence of earthworms. Earthworms are attracted to compost that is rich in nutrients, so their presence is a good sign that compost is ready to be used in the garden.
How long does composting take?
How long it takes will depend on a number of factors, such as the type of compost bin or heap you are using, the size of the compost pile, the materials you are composting, and the temperature.
In general, composting takes anywhere from two weeks to two months. But this is an ongoing process as you continually add more items to your pile or bin.
What can I do with the finished compost?
Finished compost can be used almost anywhere in the landscape. It can be used as a mulch around trees and shrubs, or it can be added to planting beds. Compost can also be mixed into potting soil to improve drainage and aeration. You can even spread it on the lawn as a natural fertilizer.
There are many benefits to composting, so there’s no reason not to start composting at home today.
Tips for maintaining your composting system and getting the most out of it
A few tips to help you on your composting journey include:
- Mix compostable materials regularly to help speed up the composting process.
- Add a compost activator to your bin or pile to help with decomposition.
- Shredding or chopping compostable materials into smaller pieces will also help speed up the composting process.
- Keep compost moist, but not too wet, by adding water as needed.
How to avoid common composting mistakes
As a beginner, you might make some composting mistakes. But don’t worry, we all do. Here are four composting mistakes that are common among beginner composters, and how to avoid them.
Mistake #1 Not Adding Enough Materials to the Compost Bin or Heap
When starting out, it can be tempting to only add a few items to the compost bin or heap. But composting actually works best when there is a mix of different materials. This will help to create the right balance of carbon and nitrogen, which is necessary for the composting process.
Mistake #2 Not Adding Enough Water
Another common mistake is not adding enough water to the compost pile or bin. The compost should be moist, but not soggy. If the compost is too dry, it will slow down the composting process. If it’s too wet, it will create an unpleasant odor.
Mistake #3 Adding the Wrong Materials to the Compost Bin or Heap
As I mentioned before, there are certain items that should not be composted. These items can attract pests, create unpleasant odors, or take too long to compost.
Mistake #4 Not Turning the Compost Pile or Bin
Turning the compost pile or bin is important because it aerates the compost and helps to speed up the composting process. If you don’t turn the compost pile, it will still compost, but it will take much longer.
Is it better to have a compost pile or bin?
The choice of a pile, tumbler, or bin will depend on a few factors, such as the amount of compost you want to produce and the amount of space you have.
If you have a small yard and want to compost a small number of kitchen scraps, then a compost bin might be the best option. If you have a larger yard and want to compost more materials, then a compost pile might be a better choice.
Cost of a compost bin?
A compost bin costs between $60 and $300. The price will depend on the size and type of compost bin you choose.
See these compost bins:
Advantages and disadvantages of composting
You now know how to compost but here are a few pros and cons as well.
7 Pros:
- Improve soil quality around your home.
- Good for the environment.
- Reduce impact on landfills.
- It’s a great way to recycle.
- Composting can be fun and satisfying.
- It’s easy and requires little effort.
- It’s free or low-cost.
7 Cons:
- It can attract pests if not done correctly.
- Smells bad if done incorrectly.
- Potential upfront costs if buying a bin or tumbler.
- Takes some time to achieve the compost.
- Needs some space dedicated to the pile or bin.
- Cannot compost all your garbage or waste.
- You need to monitor the progress and stir the pile.
FAQ:
No, compost bins do not attract rats. However, if you add meat or other food scraps to the compost bin, it will attract pests.
No, compost bins should not smell. If your compost bin smells, it means that something is wrong with the composting process. The compost might be too wet, or there might not be enough air circulation. You can avoid compost bin smells by adding the right mix of materials.
Grass clippings and leaves take about two weeks to compost.
It takes about two weeks for food scraps to compost.
Your compost should be dark and crumbly. If it’s too wet, it will have a slimy texture. If it’s too dry, it will be powdery. The compost should also have an earthy smell. If it smells bad, that means something is wrong with the composting process.
Yes, homemade compost is just as good as store-bought compost. In fact, it might even be better because you know exactly what’s in it.
Worms are not necessary for the composting process, but they can help to speed it up. If you add worms to your compost, they will help to aerate the compost and break down the organic matter.
Yes, beer can be added to compost. However, it’s important to note that beer can attract pests, so be sure to add it in moderation.
Yes, you can compost dog poop. However, it’s important to make sure that the dog poop is composted properly so that it doesn’t attract pests or create an unpleasant odor. Properly composted dog waste will destroy pathogens, so you can use the compost as a soil additive. Do not use this compost for crops or food plants. The best way to compost dog poop is to mix it with other materials, such as leaves, grass clippings, or food scraps. You can also add it to a compost tumbler.
The compost bin should be at least 10 feet from the house. This will help to keep pests away from your home.
Yes, you should add water to the compost bin. The compost should be moist but not wet. If it’s too wet, it will create an unpleasant odor. If it’s too dry, it will slow down the composting process. You can add water to the compost bin once a week or as needed.
How To Start Composting In A Tumbler – Summary
Composting is a great way to reduce waste and recycle organic materials. It’s also a good way to improve the quality of your soil.
Composting is simple to accomplish, and there are several different methods for doing it at home. If you want to start composting at home, I hope these five tips will help get you started.
10 great composing products for you:
You can make your own compost at home with the help of these great products.
Indoor Compost Bins:
- EPICA Stainless Steel Compost Bin 1.3 Gallon-Includes Charcoal Filter.
- KaryHome Hanging Small Trash Can with Lid Under Sink for Kitchen, Food Waste Bin, Kitchen Compost Bin for Counter Top
- simplehuman 4 Liter / 1.06 Gallon Compost Caddy, Detachable and Countertop Bin, Brushed Stainless Steel
Outdoor Compost Bins/Tumblers:
These are the best composting tumblers:
- VIVOSUN Tumbling Composter Dual Rotating Batch Compost Bin 43 Gallon Black.
- Hot Frog Rolling Compost Tumbler Bin, 37 Gallon
- Maze Compost Tumbler and Cart Combo
- Miracle-Gro Dual Chamber Compost Tumbler – Easy-Turn, Fast-Working System – All-Season, Heavy-Duty, High Volume Composter with 2 Sliding Doors – (2 – 18.5gallon /70 Liter)
- Worm Factory 360 Black US Made Composting System for Recycling Food Waste at Home

I’m J.S., I created and am the content manager at DIYHouseSkills.com. I do the research and write the articles that appear on this website. I’ve learned many household skills during my life and think it’s important to at least know the basics so that you can save yourself time and money… READ FULL BIO >
- Expert-Backed Tips to Avoid Bee Stings While Gardening
 Gardening is a passion for many, but the presence of bees can cause discomfort and fear. As a seasoned gardener with years of experience under my belt, I’ve learned to appreciate the essential role bees play in the ecosystem while also understanding the importance of safety while gardening in their presence. This comprehensive guide breaks down each step to ensure… Read more: Expert-Backed Tips to Avoid Bee Stings While Gardening
 - The Benefits of Growing AeroGarden Flowers
 Growing flowers in an AeroGarden is a great way for DIY homeowners to add color and life to their homes. With its self-contained design, easy setup, and versatile growing options, the AeroGarden makes indoor gardening quick and hassle-free. This guide will provide an overview of the basics of growing flowers in an AeroGarden, including what types of plants work best,… Read more: The Benefits of Growing AeroGarden Flowers
 - Keep Those Pesky Bees Away From Your Hummingbird Feeder
 If you’re one of the many people who enjoy watching hummingbirds feed, you may have also noticed that bees are often drawn to the sugar water in these feeders. While bees can be beneficial to gardens and flowering plants, they can be a nuisance when it comes to trying to watch hummingbirds up close. Here are a few tips on… Read more: Keep Those Pesky Bees Away From Your Hummingbird Feeder
 - When Do Hummingbirds Leave | Advice For Your Area
 When do hummingbirds leave and when to take down your feeder? I’ve collected the data and compiled it for you in an easy-to-read list displayed in this article. People across the U.S. enjoy watching hummingbirds and setting out feeders for these migratory birds. Inevitably the time will come for hummingbirds to move south, so how do you know when that… Read more: When Do Hummingbirds Leave | Advice For Your Area
 - How To Choose The Right Indoor Greenhouse | Advice
 Looking to buy the best indoor greenhouse? Whether you’re a beginner or an experienced gardener, there’s an indoor greenhouse perfect for your needs. Indoor greenhouses allow you to garden all year round, regardless of the weather outside. They’re also great for growing seedlings and nurturing plants until they’re big enough to be transferred outdoors. The Best Indoor Greenhouses And be… Read more: How To Choose The Right Indoor Greenhouse | Advice
