A common issue faced by many Nest Thermostat users is the Delayed Message phenomenon.
This occurs when there is a significant lag between the thermostat’s command and the actual execution of that command.
This issue, while not detrimental to the general functioning of the device, can cause inconveniences and disrupt the user experience.
The good news is, this problem can be addressed through a DIY project. With a little guidance and patience, you can troubleshoot and rectify this issue in the comfort of your own home, without the necessity of professional intervention.
- Troubleshooting Steps to Fix Nest Delayed Messages
- Step 1: Check HVAC Airflow
- Step 2: Check Nest Wi-Fi Connection
- Step 3: Update Your Nest Thermostat and Mobile App
- Step 4: Lower Demand
- Step 5: Check Nest Safety Protocols
- Step 6: Evaluate Your Nest Thermostat’s Power Supply
- Step 7: Diagnosing Hardware Issues Causing Nest Thermostat Delayed Message
- Step 8: Minimizing Wireless Interference Leading to Nest Thermostat Delayed Message
- Tips to Prevent Future Nest Delayed Message Issues
- Understanding the Thermostat Maintenance Band (TMB) in Nest Thermostats
- Recap of Steps to Fix Nest Thermostat Delayed Message
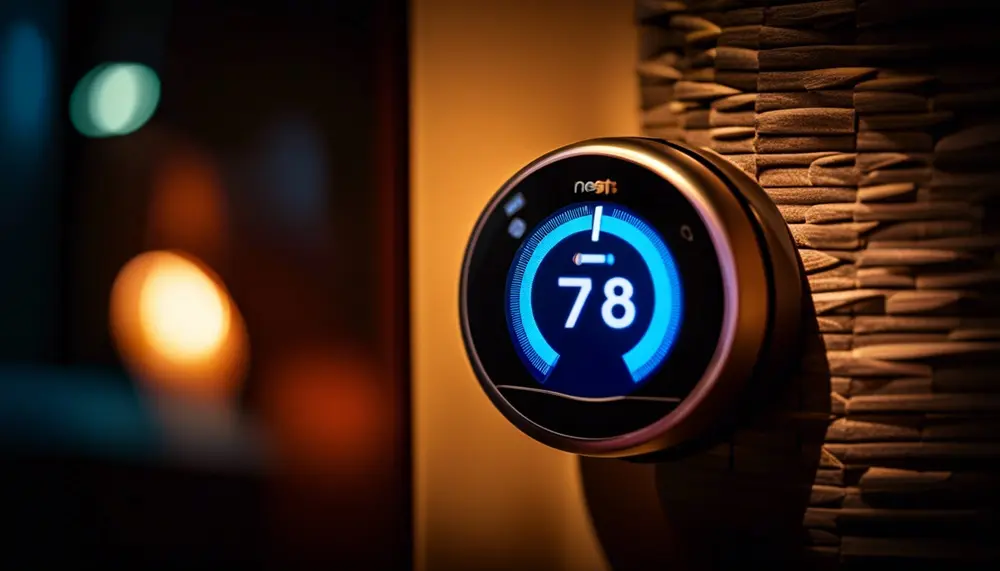
The Nest Thermostat is a smart and efficient way to control the temperature in your home. However, like any electronic device, it may encounter occasional issues, such as delayed messages.
If you’re experiencing delayed messages on your Nest Thermostat, don’t worry. In this article, we will walk you through some troubleshooting steps to help resolve this issue.
Troubleshooting Steps to Fix Nest Delayed Messages
Step 1: Check HVAC Airflow
The first step in troubleshooting delayed messages is to check for any airflow issues.
Make sure that the filter on your HVAC system is clean and not clogged with dirt or debris. If it appears dirty, replace it with a new one.
Next, check if the evaporator coil in your HVAC system is iced up.
If the evaporator coil is iced up, it could be causing the delayed messages on your Nest thermostat. Here are the steps to check your evaporator coil:
- Locate the Evaporator Coil: The evaporator coil is usually located inside the air handler or attached to the furnace. It’s within a metal box that may be covered by a removable panel.
- Turn Off the Power: Before you inspect the evaporator coil, ensure to turn off the power for safety reasons.
- Remove the Panel: Once the power is off, remove the panel to access the evaporator coil.
- Inspect the Coil: Look at the coil closely. If it is covered in ice or frost, this indicates that your coil is iced up.
- Defrost the Coil: If the coil is iced over, you will need to defrost it. Switch off your HVAC system and let the ice naturally melt. Using a hair dryer can speed up the process, but be careful not to damage the coil.
- Call a Professional if Necessary: If you’re uncomfortable performing these steps, or if the problem persists after defrosting the coil, it may be best to call a professional HVAC technician.
Remember, even if you’re a novice, you can handle these steps with some care and patience. However, if you’re unsure at any point, don’t hesitate to reach out to a professional. It’s better to be safe than sorry. Troubleshooting Tips for Smart Thermostats
Step 2: Check Nest Wi-Fi Connection
If the airflow seems to be okay, the next step is to check your Wi-Fi connection.
- Open the Nest app on your smartphone or tablet.
- Navigate to the thermostat settings or devices section.
- Locate your thermostat and check its network status.
- If the connection seems weak or unstable, try moving closer to your Wi-Fi router or consider improving your home’s Wi-Fi coverage.
Make sure that both your Nest Thermostat and mobile device are connected to the same Wi-Fi network.
If your Wi-Fi connection appears weak or unstable, try moving the thermostat closer to your router or installing a Wi-Fi extender.

Step 3: Update Your Nest Thermostat and Mobile App
If both airflow and Wi-Fi connectivity seem fine, the next step is to check for any software updates on your Nest Thermostat and Mobile App.
Updating the software of both your Nest Thermostat and the Nest app on your mobile device can help in getting rid of any potential bugs or glitches causing the delayed messages issue.
- Updating the Nest Thermostat:
- Press the ring on your Nest thermostat to access the menu.
- Rotate the ring to the ‘Settings’ option and press to select it.
- Scroll down to ‘Software’ and select it. If there’s an available update, it will show up here.
- Tap on ‘Update’ and the thermostat will start updating the software. This may take some time and your thermostat will restart after the update.
- Updating the Nest App:
- Open the app store on your mobile device (Google Play for Android or App Store for iOS).
- Search for the ‘Nest’ app.
- If there is an update available, the ‘Update’ button will appear. Tap on it to start updating the app.
- Once the update is complete, restart the app.
If you need more detailed instructions, refer to the official Nest support page: Update your Nest thermostat software
Step 4: Lower Demand
If you’re experiencing delayed messages during times of high system demand, such as extreme weather conditions, try lowering the temperature set on your thermostat.
This will give the compressor some time to catch up and start, avoiding a delay in response.
The thermostat is designed to prevent rapid cycling of your heating or cooling systems, which can inadvertently cause delays in response times.
For example:
During a particularly hot summer day, you might be tempted to set the thermostat to a significantly lower temperature for quick cooling. However, this can place an unnecessarily high demand on your system, causing the compressor to take longer to start up and hence leading to a delay.
Instead, aim to gradually lower the temperature setting.
This lessens the immediate strain on the system, allowing the compressor time to start without causing a delay.
- You could start by lowering the temperature setting by 2-3 degrees below the current room temperature, allowing the system to cool the room gradually.
- Once the room has reached this temperature, you can again lower the thermostat setting by another 2-3 degrees.
This way, you manage to cool the room effectively without putting undue stress on your HVAC system thus avoiding the delayed message.
Remember, maintaining a balance between your comfort and the system’s operating capacity is key in ensuring the longevity of your HVAC system and the effective functioning of your Nest Thermostat.
Step 5: Check Nest Safety Protocols
If you suspect that the safety protocols built into your Nest Thermostat may be causing delayed messages, try turning off and back on the thermostat’s cooling or heating function.
This will reset the safety protocols and potentially fix the issue.
The safety protocols in a Nest Thermostat are designed to protect your HVAC system from potential damage. These include:
- Time Delay: To prevent rapid cycling, a delay of about five minutes is set between the cooling and heating cycles. This delay allows the compressor to rest between cycles.
- Heat Pump Balance: This feature is available on systems with a heat pump and auxiliary heat. The Heat Pump Balance decides when to use auxiliary heat, which can prevent the system from overworking and leading to delayed messages.
- Early-On: The Early-On feature starts heating or cooling early to reach the scheduled temperature at the designated time. If your system is limited (for example, due to an old or damaged HVAC system), the Nest thermostat will automatically turn off Early-On.
- Cool to Dry: This feature uses your air conditioner or heat pump to reduce excessive humidity. If your system can’t cool and dehumidify at the same time, Cool to Dry will be turned off.
Understanding these safety protocols can help you better manage your Nest Thermostat and avoid issues like the Nest Thermostat Delayed Message. However, always remember to consult with a professional if you encounter recurring problems.
Step 6: Evaluate Your Nest Thermostat’s Power Supply
Power issues can frequently be at the root of a Nest Thermostat Delayed Message. If you suspect that your thermostat is not getting enough power, it’s crucial to perform a thorough inspection of your home’s power supply and your thermostat’s wiring.
- Check for Power Outages or Fluctuations: Sometimes, power outages or fluctuations in your locality could cause the thermostat to reboot, displaying a ‘Delayed’ message. Confirm whether there have been any recent power outages in your area. If so, your thermostat should return to normal once power is restored.
- Inspect the Power Source: Ensure that the power source supplying your Nest Thermostat is functioning correctly. Check for any tripped breakers or blown fuses in your electrical panel which might be affecting the power supply to your thermostat.
- Examine the Thermostat’s Wiring: Check to ensure all wires connected to your thermostat are intact and securely fastened. Loose or damaged wires can cause power issues leading to the ‘Delayed’ message. If you discover any damaged wires, it’s recommended to contact a professional to repair them.
- Verify Thermostat’s Battery Status: Your Nest Thermostat relies on a rechargeable lithium-ion battery. If this battery is low or depleted, it may result in a delayed message. If possible, check the battery status of your Nest Thermostat in the ‘Technical Info’ under the ‘Settings’ menu. If the battery is low, the device should recharge itself once connected to a power source. If it doesn’t, consider seeking help from a professional.
By examining these aspects, you can potentially identify and rectify any power-related problems that might be causing the Nest Thermostat Delayed Message. However, in case of recurrent issues, it is always advisable to consult with a certified technician.
Step 7: Diagnosing Hardware Issues Causing Nest Thermostat Delayed Message
You may be facing a hardware issue with your device. Understanding what could potentially be wrong with the hardware can help you communicate effectively with professionals or even troubleshoot on your own.
- Faulty Base or Display: The base or display of your Nest Thermostat could be malfunctioning. Look for any visible signs of damage. If the display is unresponsive or keeps going blank, or if the base is loose or damaged, these could be indicators of a hardware issue.
- Broken or Ineffective Sensors: Your thermostat relies on sensors to read the room temperature accurately. If these sensors are not functioning correctly, it could result in erratic behavior, such as the ‘Delayed’ message.
- Internal Component Failure: Sometimes, hardware issues may stem from an internal component failure that isn’t visible externally. This could be due to faulty manufacturing or wear and tear over time.
Note: In all these scenarios, it’s crucial to remember that diagnosing and repairing hardware issues involves a certain degree of technical expertise.
If you’re not comfortable with this level of troubleshooting, it’s always advisable to seek professional help. You can contact Nest Support or a certified HVAC technician for further assistance.
Step 8: Minimizing Wireless Interference Leading to Nest Thermostat Delayed Message
In some cases, your Nest Thermostat Delayed Message could be a result of wireless interference caused by other devices in your home.
Here’s how you can identify and eliminate any such potential interference:
- Identify Potential Interference Sources: Start by identifying devices in your home that could interfere with your Nest Thermostat’s Wi-Fi signal. These can include cordless phones, baby monitors, microwave ovens, wireless speakers, or other wireless devices.
- Create a Safe Distance: If any such devices are located close to your thermostat, consider relocating them or the thermostat itself. A safe distance of at least 1 meter (3 feet) between the thermostat and potential interference sources is usually recommended.
- Change Wi-Fi Channel: If your router allows, try changing the Wi-Fi channel. Because many devices use the default channel, changing it can often help mitigate interference.
- Turn off Interfering Devices: If possible, try turning off the potential interfering devices one by one, to see if your thermostat performance improves.
Remember, each home is unique and what works in one scenario may not work in another. However, these tips should give you a good starting point. If interference continues to be a problem, consider reaching out to a Wi-Fi expert or an HVAC professional for further assistance. How to Troubleshoot Wi-Fi Dead Zones at Home
Tips to Prevent Future Nest Delayed Message Issues
To avoid encountering the delayed message issue with your Nest Thermostat in the future, follow these practical steps:
- Optimize Your Wi-Fi Setup: Ensure your Wi-Fi router is placed in a central location within your home. This helps to improve the signal strength throughout your house, ensuring a stable connection between your Nest Thermostat and the network. Additionally, keep your router away from interference sources such as microwaves and cordless phones, which can interrupt the Wi-Fi signal.
- Update Firmware Regularly: Nest regularly releases firmware updates to enhance device performance and fix known bugs. Ensure that you regularly check for these updates in the ‘Software Update’ section under the ‘Settings’ menu of your Nest App. If a new update is available, install it promptly.
- Clear Cache/Storage of Nest App: Over time, the Nest App on your mobile device may accumulate cache or data that can cause performance issues. Regularly clearing the cache and data can help ensure the smooth functioning of the app. You can usually do this from the ‘Settings’ menu of your mobile device.
- Regular Inspection of Device and Wiring: Regularly inspect your Nest Thermostat to catch any visible signs of damage early. Check the wiring, the base, and the display of your thermostat. If anything seems out of the ordinary, contacting a professional is advised.
- Consult a Professional: If you’re unsure about any of the steps or if your device continues to show the delayed message, consult a certified Nest technician or a professional HVAC technician. They can help diagnose and resolve any issues promptly.
By taking these preventive steps, you can minimize the chance of encountering the ‘Delayed’ message in the future and ensure your Nest Thermostat operates optimally.
Understanding the Thermostat Maintenance Band (TMB) in Nest Thermostats
The Thermostat Maintenance Band (TMB) is a feature unique to Nest Thermostats designed to optimize your heating and cooling systems.
It works by establishing a small temperature range, or ‘band’, around your chosen set point – the temperature you want your home to be. This band allows minor fluctuations in temperature, reducing the frequency with which your heating or cooling system needs to turn on and off, thereby extending the lifespan of your HVAC system and conserving energy.
For example, if you’ve set your thermostat to 70 degrees Fahrenheit, the TMB might allow the temperature to drop to 69 or increase to 71 before your heating or cooling system kicks in. This feature helps to prevent your HVAC system from short cycling, which can lead to increased wear and tear.
Your Nest Thermostat automatically determines the TMB based on multiple factors such as the type of heating/cooling system you have, the current weather, and your home’s energy profile. By understanding and making use of the TMB, you can ensure more efficient operation of your Nest Thermostat and potentially save on your energy bills.
Recap of Steps to Fix Nest Thermostat Delayed Message
In conclusion, fixing the ‘Delayed’ message on your Nest Thermostat involves a multi-step approach:
- Check For Power Issues: Make sure your Nest Thermostat is properly connected to a power source. Battery issues could cause the ‘Delayed’ message.
- Diagnose Hardware Issues: Inspect the base or display for damage, check the sensors, and consider the possibility of internal component failure.
- Minimize Wireless Interference: Identify and eliminate any potential sources of wireless interference. This could involve relocating devices, changing your Wi-Fi channel, or turning off interfering devices.
- Optimize Your Wi-Fi Setup: Place your Wi-Fi router in a central location and away from interference sources.
- Update Firmware Regularly: Keep your Nest Thermostat software up-to-date.
- Clear Cache/Storage of Nest App: Regularly clear the cache and data of your Nest App to maintain optimal performance.
- Regular Inspection of Device and Wiring: Regularly inspect your Nest Thermostat for any visible signs of damage.
- Consult a Professional: If unsure or if problems persist, don’t hesitate to seek professional help.
Adopting these steps can help eliminate the ‘Delayed’ message, improve the functioning of your Nest Thermostat, and ensure a comfortable and efficient home environment.
- DIY Secrets: Finding and Using the Bosch Ice Maker Reset Button
- Chest Freezer vs. Upright Freezer: Which Should You Buy?
- Say Goodbye to Stubborn Stains on Stainless Steel Pots
- Transform Your Morning Brew: Expert Tips for Better Coffee
- Effortlessly Remove Mold From Tile Grout with These Easy Steps

I’m J.S., I created and am the content manager at DIYHouseSkills.com. I do the research and write the articles that appear on this website. I’ve learned many household skills during my life and think it’s important to at least know the basics so that you can save yourself time and money… READ FULL BIO >
