We’ve all been there, listening to that relentless dripping, watching our water bill inch up, and wondering how much it’s going to cost to get it fixed this time.
But hey, what if I told you that you don’t need a plumbing degree to tackle this issue?
How To Fix A Leaky Faucet Answer:
Fixing a leaky faucet is simple and can restore it to working condition. Follow these steps:
- Replace the faucet stem or cartridge, making sure it’s aligned and installed gently.
- Reattach the handle, being careful not to overtighten and damage the threads.
- Replace any decorative parts like caps or “hot/cold” indicators, aligning them correctly.
- Turn the water supply back on and test the faucet to ensure it’s leak-free.
If it still leaks:
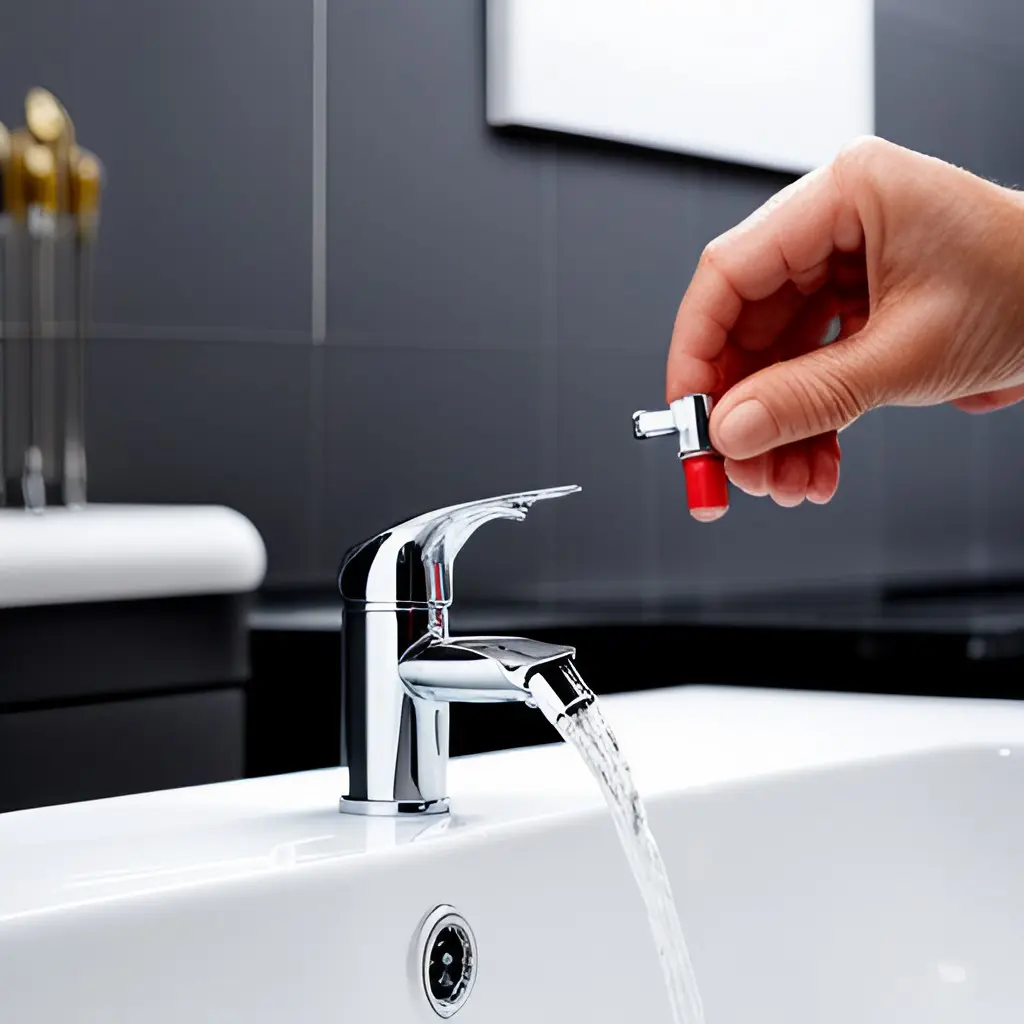
- Clean or replace the aerator at the faucet’s end. This helps reduce splashing by mixing air with the water.
To maintain a smooth flow and prevent leaks:
- Regularly clean the aerator by dismantling it, rinsing, and scrubbing off mineral buildup before reassembling.
This step-by-step process helps ensure your faucet’s longevity and optimal performance.
Follow-Up Questions:
- Understand the Overall Process
- Necessary Tools
- Step 1: Turn off the Water Supply
- Step 2: Remove the Faucet Handle
- Step 3: Identify and Replace the Cartridge or Washer
- Step 4: Reassemble the Faucet
- Step 5: Thorough Cleaning and Maintenance of the Faucet Aerator
- Pro Tips for Maintaining Your Faucet
- Conclusion:
In this blog post, we’ll provide you with a step-by-step guide on how to fix your own leaky faucets and save yourself some money in the process.
Understand the Overall Process
Before we dive into the steps, let’s first understand the overall process.
Fixing a leaky faucet typically involves four stages.
- First, you’ll need to prepare your tools and turn off the water supply to the faucet.
- Second, you’ll dismantle the faucet to diagnose the source of the leak. This usually involves removing the handle and the packing nut to reach the stem, which is usually where the problem lies.
- The third stage involves repairing or replacing the faulty component, such as the washer or the O-ring. According to a study by the Environmental Protection Agency (EPA), fixing household water leaks can save homeowners about 10% on their water bills.
- Finally, you’ll reassemble the faucet and test it to ensure the leak has been fixed.
This task may seem daunting, but with a bit of patience and the right guidance, it is entirely doable for most homeowners. Now, let’s delve into the specific steps.
Necessary Tools
Having the right tools at your disposal can make the task of fixing a leaky faucet more manageable. Here is a list of tools that you will typically need:
- Adjustable Wrench: This tool is crucial for loosening and tightening nuts and bolts.
- Phillips and Flathead Screwdrivers: You’ll need these to remove the faucet handle.
- Plumber’s Tape: Also known as Teflon tape, this is used for sealing pipe threads to prevent leaks.
- Replacement Parts: Depending on the source of the leak, you might need new washers, O-rings, or a new stem.
- Plunger or Drain Snake: These can help clear out any debris that might be causing the leak.
- Bucket and Towels: These will help keep your work area dry as you fix the faucet.
Remember, the specific tools and parts required might vary depending on your faucet’s make and model. Always check your faucet manual or consult with a plumbing professional if you’re unsure.
Also Read: Kohler Touchless Faucet Not Working | Advice to Fix
Step 1: Turn off the Water Supply
Halting the flow of water is a pivotal first step in your faucet repair adventure. It’s a task often underestimated in terms of complexity and importance. According to the experts at the American Society of Plumbing Engineers (ASPE), ensuring a water-free work zone not only facilitates a smoother repair process but also prevents potential water damage and wastage.
This process can seem daunting for novice homeowners but don’t worry, just follow these detailed steps:
Locate the Shut-off Valve
The shut-off valve, a critical player in this endeavor, might be lurking under your sink, awaiting discovery. It’s a silver sentinel guarding the gateway to your plumbing’s water supply. Here’s how to tame it:
- Quest for the Valve: Embark on a quest beneath your sink. Your target is a silver valve, often shrouded in mystery and the shadows of pipes.
- The Turn of Fate: Grasp the valve and turn it clockwise with determination. This is the “righty-tighty” mantra in action, a twist that seals the flow and sets the stage for your plumbing prowess.
- Verification of Victory: Your victory dance comes with turning on the faucet to ensure silence and a stop to the water’s flow. No drips? Then, you’ve secured your battleground.
Ensuring Absolute Dryness
Before wielding your tools, confirm the cessation of any water trickle or stream from the faucet. This moment of confirmation is crucial, as noted by a study from the Environmental Protection Agency (EPA), indicating that diligent water management during repairs can contribute significantly to household water conservation efforts.
Are You Ready for the Next Step?
With the water supply firmly in your control and the stage set for a dry workspace, are you prepared to unveil the mysteries of your faucet’s interior?
Remember: Every gallon of water saved not only reflects on your water bill but also contributes to the global effort of water conservation. Your actions echo far beyond your home, reaching into the heart of environmental stewardship.
Tip: If you’re struggling to find the shut-off valve under the sink, you may need to turn off the main water supply for your house. The main valve is often located in the basement or outside along the exterior of the house. It might be larger and colored red or blue.
Step 2: Remove the Faucet Handle
Unlocking the secrets of your faucet begins with the removal of its handle, an endeavor that pivots around finesse more than brute force. Whether you’re confronting a single lever, a stubborn knob, or an ornate cross handle, the procedure unfurls with an almost ceremonial precision.
Here are the detailed steps:
Unearth Hidden Screws with Delicacy
The world of faucet handles is a diverse one, often masking its screws under decorative caps or elusive “hot/cold” indicators.
Approach this quest with a flathead screwdriver, the tool of choice for gently prying open these secretive chambers. “In every task that must be done, there is an element of fun,” as famously noted by Mary Poppins. Find the joy in uncovering what lies beneath these caps; it’s the initial step towards victory over the leak.
Employ the Right Tools with Care
Upon revealing the screw, choose your tool wisely.
The intricacy of your faucet dictates whether a flathead screwdriver or an Allen wrench shall be your ally.
Here, the universal wisdom of “lefty-loosey, righty-tighty” stands. Yet, exercise caution, for overzealous strength risks more than just pride. A piece of advice that echoes through the halls of DIY forums and professional plumbers alike is to apply pressure judiciously to avoid the heartache of a stripped screw or damaged handle.
Elevate the Handle with Precision
With the screw removed, the handle should ascend with ease. Should resistance arise, resist the siren call of hammers and brute force.
Instead, a gentle wiggle, a patient nudge, may reveal the path to success. Remember, as quoted by the great Leonardo da Vinci, “Patience serves as a protection against wrongs as clothes do against cold.”
Combat Mineral Deposits with Science
If calcified defenses bar your way, a modest application of white vinegar serves as your elixir. Drape a cloth soaked in this potion around the handle’s base and grant it the gift of time.
Even the most formidable mineral deposits bow before the might of acetic acid, dissolving into memory.
A Note About Organization
As each piece is removed, lay them out like a map to treasure. This meticulous cataloging, or a photographic memory preserved by your camera, ensures that reassembly is not a puzzle of epic proportions but a return trip with a clear path home.
By the end of this step, not only will you have mastered the removal of your faucet handle, but you’ll be one stride closer to unveiling the mysteries that lurk within its depths. Remember, this is more than a mechanical exercise; it’s a rite of passage in the realm of home improvement.
Pro Tip: For handles that seem more fortress than faucet, a dedicated handle puller tool can be the key to the kingdom. Available at your local hardware fortress, this tool is the trusted ally for those moments when vinegar and patience find their match.
Step 3: Identify and Replace the Cartridge or Washer
When faced with a dripping faucet, the culprit typically lies with either the cartridge or the washer. Unearthing the root cause is your first step toward a resolution.
Replacing a Cartridge
Replacing a cartridge might sound like a daunting task, but it’s a straightforward process once you grasp the basics. First, identify if your faucet operates on a cartridge system — many modern faucets do. Here’s how:
- Remove the Cartridge: Gently pull the cartridge straight up and out from the faucet body. It should come out without a struggle. If it doesn’t, avoid using excessive force as this can damage other parts of the faucet. Instead, gently wiggle the cartridge side to side until it loosens up.
- Buy a New Cartridge: Take the old cartridge to the local hardware store and find an identical replacement. The store staff should be able to help you find a match. If not, try to look up the make and model of your faucet online for specific cartridge information.
- Install the New Cartridge: Once you have the new cartridge, install it into the faucet body where the old one was. Make sure it fits snugly and securely.
Note: Be sure to align the new cartridge in the same orientation as the old one to ensure proper function.
See Our Buying Guide: 7 Best Touchless Kitchen Faucets Review + Advice
Replacing a Washer
If your faucet uses a washer, here’s how to replace it:
- Remove the Faucet Stem: The washer is located in the faucet stem. Remove the stem by unscrewing it from the valve seat.
- Remove the Old Washer: Now, you should be able to see the old washer. Use a screwdriver or something similar to gently remove it.
- Buy a New Washer: Take the old washer to the hardware store and find an identical replacement.
- Install the New Washer: Place the new washer where the old one was in the valve seat. Make sure it fits securely and doesn’t move around.
- Reassemble the Faucet: Screw the stem back into the valve seat and reassemble the rest of the faucet.
Note: When buying a new washer or cartridge, it can be helpful to take a picture of your faucet and its model number. This can help the store staff find the exact parts you need.
By following these steps carefully and patiently, you should be able to successfully replace the cartridge or washer and fix your leaky faucet. Remember, if the leak persists after your repair attempt, don’t hesitate to consult with a plumbing professional.
Step 4: Reassemble the Faucet
After the faulty cartridge or washer has been replaced, it’s time to put the faucet back together. Care must be taken to ensure every component is returned to its correct position. If done properly, your faucet should work as good as new. Here’s a step-by-step guide on how to do this:
- Replace the Faucet Stem or Cartridge: If you replaced a washer, start by screwing the valve stem back into the valve seat. Make sure it is tightened securely but avoid using excessive force, which could cause damage. If you replaced a cartridge, ensure that it fits snugly into the faucet body, aligning it as the old one was.
Tip: Some cartridges are directional. Make sure you’ve installed it following the correct orientation.
- Put Back the Handle: Now, put the handle back on. It should fit onto the stem or cartridge without force. If it’s a tight fit, try gently wiggling it until it slides on.
- Attach the Screw: Retrieve the screw you kept safe during disassembly. Use your screwdriver or Allen wrench to reattach the handle to the stem or cartridge. Turn it clockwise (right) to tighten it.
Tip: Do not overtighten the screw as this could strip the threads or cause the handle to become stuck.
- Replace Any Decorative Parts: If your handle had a cap or a “hot/cold” indicator, don’t forget to replace these. They usually snap or screw back into place easily.
Tip: Make sure to align any text or design correctly on the cap or indicator before attaching it.
- Turn the Water Supply Back On: Once everything is securely in place, turn the water supply back on. This is usually done by turning the knob under the sink clockwise.
- Test the Faucet: Finally, test the faucet by turning it on. Let it run for a few moments and check for any leaks.
Tip: It’s normal for the water to sputter a bit when you first turn it on. This is just air being expelled from the lines.
By following these steps, you can successfully reassemble your faucet after a repair. Always remember to handle the parts gently and to keep track of every component during disassembly and reassembly. If you notice that the faucet is still leaking after the repair, consider seeking help from a professional plumber.
Step 5: Thorough Cleaning and Maintenance of the Faucet Aerator
Should your faucet persist in leaking after replacing either the cartridge or the washer, the issue could very well lie with the aerator. The aerator is a small but crucial component that is situated at the end of the faucet. Its main purpose is to blend air into the water flow to significantly reduce any potential splashing.
How to Clean and Maintain the Aerator
- Remove the Aerator: Unscrew the aerator from the end of the faucet. You should be able to do this by hand, but if it’s too tight, you may need a wrench. Remember to use a cloth between the aerator and the wrench to avoid damaging the aerator’s finish.
Tip: To prevent the aerator parts from accidentally going down the drain, close the sink drain or cover it with a towel while you work.
- Disassemble the Aerator: Carefully take apart the aerator components. This usually includes the outer housing, a mesh screen, a flow restrictor, and several rubber washers. Be sure to remember the order in which you removed the parts for easy reassembly.
- Clean the Parts: Hold the parts under running water to rinse away any loose debris. For more stubborn mineral buildup, use a toothbrush to gently scrub the parts. If the buildup persists, soak the aerator parts in a mixture of water and vinegar for a few hours, then scrub again.
Tip: If your aerator has several small parts, consider cleaning them in a bowl to avoid losing any down the sink.
- Reassemble and Reinstall the Aerator: After thoroughly cleaning and drying the parts, reassemble the aerator in the same order in which you disassembled it. Screw it back onto the faucet, ensuring a secure but not overly tight fit.
- Test the Faucet: Turn the water supply back on and run the faucet to check if the leak has been fixed.
Tip: If the aerator leaks or the faucet flow is uneven, try unscrewing the aerator, adjusting the internal parts, and screwing it back on.
By regularly cleaning your faucet aerator, you ensure a smooth, splash-free water flow, potentially extend the life of your faucet, and avoid issues like leaks.
Pro Tips for Maintaining Your Faucet
In addition to the steps outlined above, there are a few more professional tips that can help you maintain your faucet and prevent further leaks:
- Regularly Inspect Your Faucet: Make a habit of inspecting your faucet for leaks or drips. Catching a leak early can save you from more significant repairs down the line.
- Be Gentle with Your Faucet: While it may seem sturdy, your faucet can be damaged by excessive force. Whether turning it on and off or performing repairs, always handle your faucet with care to prevent unnecessary wear and tear.
- Use Plumber’s Tape: When reassembling your faucet, consider using plumber’s tape on the threads of the valve stem or cartridge. This can help prevent leaks and ensure a tighter seal.
- Consider Upgrading Your Faucet: If your faucet is older or frequently in need of repair, it may be more cost-effective to replace it with a newer model. Today’s faucets are more efficient and often come with features like touchless operation and water-saving technologies.
By following these pro tips, you can extend the lifespan of your faucet, improve its performance, and prevent inconvenient leaks.
Conclusion:
Fixing a leaky faucet is a DIY task that any homeowner can handle. The steps involved are simple and don’t require any special tools or knowledge. By following our step-by-step guide, you can fix your leaky faucet and save yourself some money on plumbing expenses. Remember to always turn off the water supply and take safety precautions when working with faucets.

I’m J.S., I created and am the content manager at DIYHouseSkills.com. I do the research and write the articles that appear on this website. I’ve learned many household skills during my life and think it’s important to at least know the basics so that you can save yourself time and money… READ FULL BIO >
- How Do You Iron A Shirt For Beginners? (Easy Steps)
- Fleximounts Overhead Garage Storage Installation: How-To
- The 5 Best Indoor Garden Systems (Reviewed And Compared)
- Kohler Touchless Faucet Not Working | Advice to Fix
- Opal Nugget Ice Maker Troubleshooting | How To Fix
- How to Repair a Sage Coffee Machine
- Eufy Scale Troubleshooting | How To Fix
- Instant Pot Problems, Best Guide To Fix