Tackle your next DIY project with confidence by learning how to replace a door handle with this comprehensive guide. We break down the process into manageable steps and provide useful tips and warnings to ensure your success.
Firstly, it’s important to understand that not all door handles are the same.
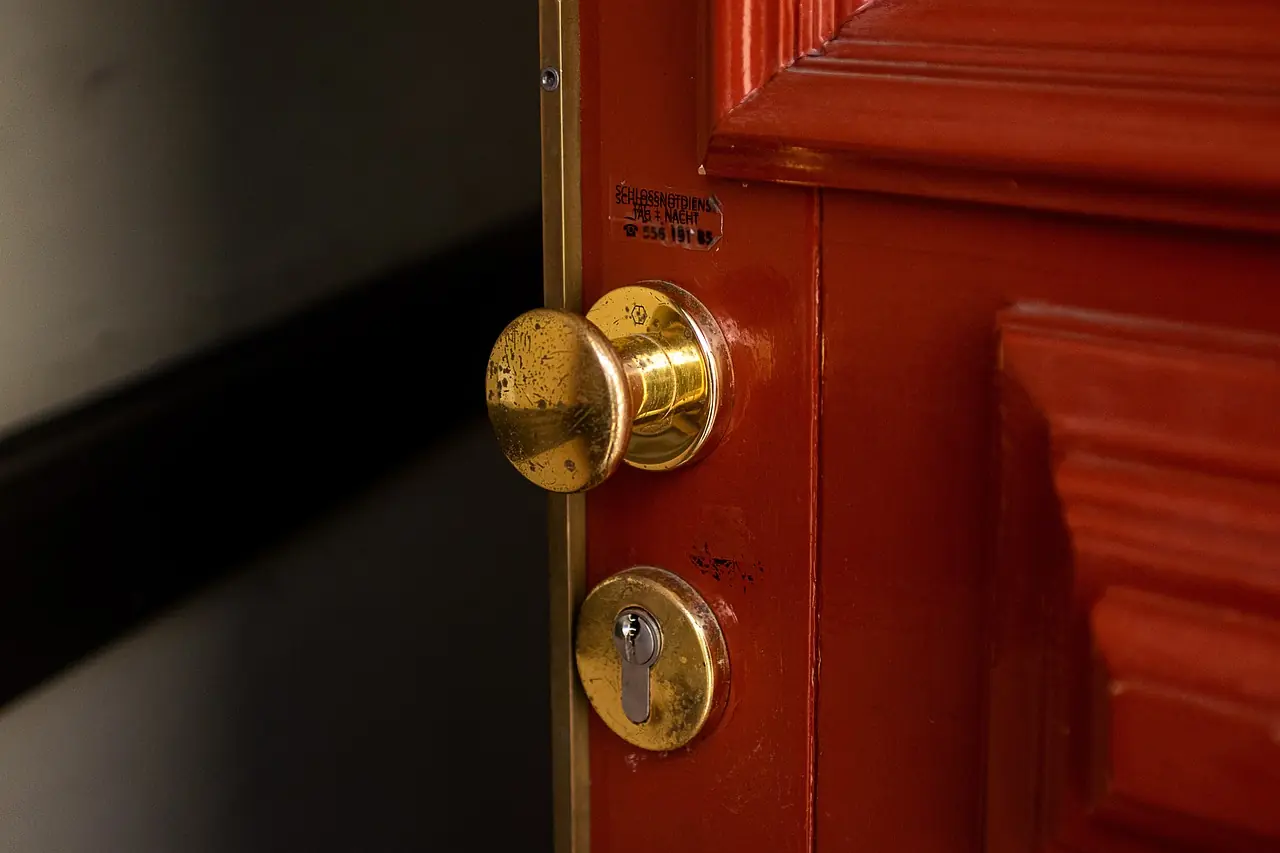
Your door’s backset – the distance from the edge of the door to the center of the hole drilled for the door handle – will determine the type of handle you need.
Measuring this before selecting your new handle ensures a perfect fit.
This may seem like a daunting task but with the correct precautions and a systematic approach, it’s a breeze. Our guide provides detailed instructions for every stage of the process, ensuring you won’t get stuck halfway through with a handle-less door.
The article isn’t just about providing instructions. We believe in empowering our readers with knowledge. That’s why we have included references and additional resources for further information. With our expert advice, you can complete the project with confidence knowing you’ve done your homework.
- Tools and Materials Needed for Replacing a Door Handle
- Step-by-Step Guide to Removing the Old Door Handle
- How to Pick Your Perfect Door Handle
- Installing the New Door Handle: A Detailed Tutorial
- Testing and Adjusting the New Door Handle
- Tips and Tricks for Easy Door Handle Replacement
- Common Mistakes to Avoid When Replacing a Door Handle
- Frequently Asked Questions (FAQs) on Door Handle Replacement
- References for Further Reading
Follow our step-by-step guide, and you’ll replace a door handle like a pro, even if you’ve never done it before. Change is at your fingertips – don’t hesitate to enhance your home with this small but impactful DIY project.
Tools and Materials Needed for Replacing a Door Handle
Before you get started, ensure you have all the necessary tools and materials. Here’s what you’ll need:
- Screwdriver (Phillips or flat-head, depending on your door handle)
- New door handle set (choose one that fits your door’s design and lock requirements)
- Drill and appropriate bit (if the new handle requires new holes)
- Pencil or marker for marking screw holes
- Tape measure
- Optional: Wood putty or filler for adjustments
Safety First:
Safety should never be overlooked in any DIY project. Keep these precautions in mind:
- Wear eye protection to guard against debris.
- Work in a well-lit and clear area.
- Be mindful of the drill’s cord or use a cordless drill for convenience.
- If the door is heavy, work with someone to prevent injury.
- Keep fingers away from pinch points when using tools.
- Assess the project beforehand; if it seems out of your scope, don’t hesitate to seek professional help.
Step-by-Step Guide to Removing the Old Door Handle
Getting Ready to Remove the Old Handle
Gathering Your Tools: Before we start unscrewing and pulling things apart, make sure you’ve got everything on hand.
You’re going to need your trusty screwdriver, preferably one with interchangeable heads because you never know if you’ll need a Phillips or flat-head until you’re looking the screw in the eye.
Also, keep those new door handle parts within reach; we don’t want to be running around looking for them mid-project.
Eye Protection, Please: And yes, this might sound like your high school science class, but please wear some eye protection. Tiny metal bits and dust love to find the least opportune moments to jump into your eyes.
1. Remove the screws
Spotting and Removing Screws: Alright, now, find those screws holding your old door handle snugly in place.
They’re either flirting with you from the side of the handle or playing hide and seek underneath.
Once located, use your screwdriver and carefully loosen the screws. Keep them safe somewhere; you don’t want them going on an adventure across your floor.
2. Separate the two sides of the handle
Time for a Gentle Tug-of-war: With the screws out, it’s time to pull the handle apart.
Imagine you’re opening a treasure chest; pull with anticipation but also with care. You might find some pieces are more stubborn than others. Wiggle them gently; patience is key here.
- Once you’ve removed all of the screws, gently pull apart both sides of the door handle.
- Some handles may have additional components that need to be detached before fully removing them from the door.
Step 3: Remove any remaining hardware
Look for Stragglers: After the handle halves have decided to part ways, check for any other bits that were part of the handle assembly. You might find a few surprises, like a sneaky latch mechanism that didn’t want to come out at first.
- After separating both sides of the handle, check for any additional hardware that needs to be removed.
- This could include latch mechanisms or other parts that are connected to the handle.
Step 4: Clean up any residue
A Little Clean-up: Now, take a moment to clear the stage for the new star. Wipe away any grime or dust. It’s all about giving that new handle a clean home to settle into.
- Before installing your new door handle, take some time to clean up any residue left behind from removing the old one.
- This will ensure a smooth and clean surface for your new handle to be installed on.
And that’s the meat of it! Removing your old door handle isn’t meant to be a chore but a chance to give your door, and perhaps your room, a fresh new look. With the old handle out, you’re set to move on to welcoming the new addition to your door.
Quote: “A common oversight is neglecting the door’s alignment and latch mechanism. If your door isn’t closing properly to begin with, a new handle won’t fix underlying issues. Sometimes, a simple realignment can save you a lot of trouble down the road.”
How to Pick Your Perfect Door Handle
Alright, now that the old door handle has officially retired, it’s time for the fun part – picking out a shiny new one. Think of it like choosing the right accessory that not only looks good but also gets the job done:
- Measure Twice, Buy Once: You’ll want to make sure the new kid on the block fits right in. This means measuring the backset of your old handle (the distance from the edge of the door to the center of the handle) and making sure your new choice is a match.
- Lock and Key Compatibility: If you’re not planning a full security makeover, ensure that your new handle and your old locks are going to be best friends. Otherwise, it’s like trying to fit a square peg in a round hole – frustrating and ultimately futile.
- Style Matters: Just like picking out an outfit, you want your new door handle to accentuate your home’s style. Whether you’re going for sleek and modern or classic and rustic, make sure it reflects your taste. It’s not just a handle; it’s a statement.
- The Safety Net: Ever bought something online only to realize it looks nothing like the picture? Always check if there’s a return policy or warranty. It’s your insurance policy for peace of mind.
Picking your new door handle should be as enjoyable as scrolling through your favorite online store. With these tips, you’ll be ready to swipe right on the perfect match for your door!
Quote: “One of the most frequent mistakes I see is not taking the time to properly measure the old handle and the door’s borehole.”
Installing the New Door Handle: A Detailed Tutorial
Now that you have all the necessary tools and a new door handle, it’s time to install it. Follow these steps for a successful installation:
Step 1: Prepare the door
- Start by propping the door open with a stop or have someone hold it steady. This will prevent any accidental closing of the door while you are working.
- If your new handle requires new holes to be drilled, use a drill bit that matches the size of the backset measurement you took earlier.
- With a pencil or marker, mark where the new holes need to be drilled on the door.
Step 2: Install the latch mechanism
- Begin by inserting the latch mechanism into the edge of the door.
- Use your drill and an appropriate bit to create a hole for it if necessary.
- Secure it in place with screws provided.
- Ensure the latch is properly aligned and flush with the door before tightening the screws.
Step 3: Install the new handle
- Place the exterior side of the new handle through the hole on the outside of the door.
- Align it with the latch mechanism inside and secure it in place with screws provided.
- Repeat this step for the interior side of the handle.
Step 4: Test and adjust if necessary
- Before fully tightening all screws, test the new handle to make sure it functions smoothly.
- If adjustments need to be made, use wood putty or filler to fill in any gaps between the door and the handle’s backplate.
Step 5: Clean up and enjoy your new door handle
- Once everything is in place and functioning properly, clean up any debris from the installation process.
- Admire your new door handle and enjoy the sense of accomplishment that comes with completing a DIY project.
Testing and Adjusting the New Door Handle
After installing your new door handle, it’s crucial to carry out thorough testing to ensure it operates smoothly and efficiently. This phase is not merely a formality but a critical step in guaranteeing the longevity and functionality of your handle.
Step 1: Visual Inspection
- Start with a visual inspection to ensure that the handle and latch mechanism are properly aligned and securely fastened. Every component should sit flush against the door without any visible gaps.
Step 2: Operation Test
- Begin by testing the handle’s operation from both inside and outside the door. The handle should turn smoothly without any stiffness or squeaking. The latch should retract and extend fully without resistance or catching.
Step 3: Lock Functionality Check
- If your door handle includes a locking mechanism, test it to ensure it locks and unlocks smoothly. Don’t forget to check it from both sides of the door to confirm that it functions as intended.
Step 4: Adjustment and Troubleshooting
- If you encounter any issues during testing, such as a sticking handle or misaligned latch, adjustments may be needed. Use wood putty or filler to correct any misalignments or gaps. Tighten or loosen screws as necessary to achieve the perfect tension and alignment.
Step 5: Final Assessment
- Conduct a final assessment of the door handle’s operation. Make sure the handle returns to its horizontal position after turning, and the latch fully extends into the doorframe when the door is closed.
Tips and Tricks for Easy Door Handle Replacement
Replacing a door handle can seem daunting at first, but with the right approach, it transforms into a manageable and even enjoyable DIY project. To empower you through this process, here are some expert tips and tricks that streamline the replacement process and address common problems one might face.
Leverage the Right Tools
Ensure you have all the necessary tools at hand before starting. This includes a screwdriver (both Phillips and flat-head, depending on the screws your handle uses), a drill with various bits for any new holes, and potentially a chisel for adjusting the latch plate.
High-quality tools not only make the job easier but also prevent damage to your new door handle or door itself.
Understand the Mechanics
Spend a few moments understanding how door handles and latch mechanisms work.
This knowledge can significantly aid in troubleshooting and adjustment phases. Numerous online resources, including manufacturer’s manuals and DIY forums, offer a wealth of information. Visual guides can be especially helpful if you encounter an unfamiliar mechanism.
Measure Twice, Install Once
Accuracy is key in replacing a door handle. Measure the dimensions of your old handle and compare it to the new one, particularly the distance from the edge of the door to the center of the handle (the backset), and the spacing between screw holes.
Misalignment can lead to poor operation or even the need to start over. Boost Your Home’s First Impression: DIY Ideas for Enhancing Curb Appeal
Handle with Care
Installing a door handle involves working with small, intricate parts. Handle these with care to avoid wear or damage. If screws don’t fit easily, don’t force them — this could strip the threads or damage the hardware. Patient, careful handling ensures everything fits together perfectly, enabling smooth operation.
Seek Professional Advice When Stuck
If you hit a roadblock, don’t hesitate to seek professional advice. Hardware store experts or professional locksmiths can provide guidance tailored to your specific situation. Sometimes, a quick discussion can illuminate a simple solution you hadn’t considered.
Common Mistakes to Avoid When Replacing a Door Handle
When tackling a door handle replacement project, even seasoned DIY enthusiasts can encounter pitfalls. To ensure a seamless update to your door’s hardware, being aware of common missteps and how to avoid them is crucial. This guide is designed to equip you with the knowledge to sidestep these errors, ensuring your project is completed efficiently and effectively.
Overlooking Compatibility and Measurements
One of the most frequent mistakes is neglecting to ensure the new door handle’s compatibility with your door’s existing setup. This includes the spacing of screws, the size of the latch, and the depth of the handle itself.
- Tip: Before purchasing a new handle, measure the dimensions of your current setup carefully. Compare these measurements to those of the new hardware to guarantee a perfect fit.
Ignoring Door Type
Not all door handles are suitable for every door type. For instance, interior doors often require different handles compared to exterior doors, which need to provide additional security features.
- Tip: Always consider the door’s purpose and location when selecting a new handle. If in doubt, consult with a hardware specialist or refer to manufacturer recommendations.
Skipping the Fine Tuning
Failing to properly adjust and align the door handle and latch mechanism can lead to issues such as a sticking or loose handle, or a latch that doesn’t catch properly.
- Tip: After installation, dedicate time to fine-tuning. Adjust the alignment and tighten or loosen screws as necessary to ensure smooth operation.
Using Inappropriate Tools
Using the wrong tools for installation can damage both the hardware and the door, making the job harder than it needs to be.
- Tip: Verify you have the correct tools before beginning. A drill with a variety of bits, screwdrivers that match your screws, and a chisel for the latch plate are often essential.
Rushing the Installation
Rushing through the installation without paying attention to the details can lead to poor outcomes, including misalignment or damage.
- Tip: Take your time with each step, ensuring accuracy and proper function before moving on to the next phase.
Easy Newbie Home Maintenance (Will Save Money)
Frequently Asked Questions (FAQs) on Door Handle Replacement
Replacing a door handle can raise many questions, especially for those undertaking such a project for the first time. Below, we’ve compiled and answered several frequently asked questions to help guide you through the process with greater confidence and understanding.
Q: Are door handles easy to replace?
A: Yes, with the right tools and a basic understanding of door mechanics, most individuals can replace a door handle. It requires patience and attention to detail, but it’s a manageable task for a DIY enthusiast.
Q: Can I replace a door handle by myself?
A: Absolutely. Replacing a door handle is a straightforward DIY project. However, ensure you have all the necessary tools and instructions before beginning.
Q: How do I replace a broken door handle?
A: Start by removing the old handle, usually accomplished by unscrewing it from the door. Then, measure the dimensions to ensure the new handle will fit before installation. Follow the new handle’s installation instructions carefully.
Q: Can I change the front door handle without changing the lock?
A: Yes, in many cases, you can replace the door handle without affecting the lock. Ensure the new handle is compatible with your current lock setup for a seamless transition.
Q: Is changing a door knob as easy as replacing a door handle?
A: Yes, changing a door knob follows a similar process to replacing a door handle. Both tasks require comparable levels of mechanical understanding and dexterity.
Q: Are door handles interchangeable?
A: While many door handles are designed to be universally fitting, it’s important to verify measurements and compatibility, particularly the spacing of screw holes and the size of the latch.
Q: Who can I call to replace a door handle if I’m unable to do it myself?
A: If you find the task too challenging, professional locksmiths or handymen are well-equipped to replace door handles and will ensure the job is done correctly.
Q: Are interior door handles universal?
A: Interior door handles tend to have standard measurements; however, variations exist. Always check the specific requirements of your door before purchasing a replacement handle.
Q: Do locksmiths replace door handles?
A: Yes, locksmiths can replace door handles, especially if the handle is part of a locking mechanism. They can provide expert advice and ensure your new handle is installed securely.
From the DIY Community:
- Sandra reveals how tackling a new handle on an older door tested her patience but ultimately proved rewarding.
- Jake highlights the ease of updating interior handles, crediting his trusty cordless drill for simplified installation.
- Through his encounters, Mr. Patel notes that measurement mismatches and the lack of proper tools are common setbacks, emphasizing the importance of readiness.
Conclusion
Replacing a door handle is a feasible DIY project that can dramatically change the look and feel of a doorway. With careful preparation, the right tools, and a bit of patience, you can achieve professional results and enjoy the satisfaction of having done it yourself. Remember, the key to a smooth door-handle replacement is not just in the execution but in the meticulous planning and preparation.
References for Further Reading
For those seeking additional information or looking to expand their DIY skill set, the following resources can provide valuable insights.
- The Complete Guide to Home Repair and Improvement: This comprehensive book covers a wide range of home improvement tasks and repairs, providing detailed instructions and illustrations.
- DIY Home Projects Under $50: A collection of affordable home improvement projects that can enhance your living space without breaking the bank.
- Locksmithing, Lock Picking & Lock Opening: While not directly related to door handle replacement, understanding the mechanics of locks can be beneficial for any DIY enthusiast.
- Door Repair and Maintenance: An online resource that offers tips and tricks on maintaining and repairing various types of doors to ensure longevity and proper functionality.
These resources are designed to equip you with a broader understanding of home improvement and repair, enhancing your confidence and competence in tackling various DIY projects around your home.

I’m J.S., I created and am the content manager at DIYHouseSkills.com. I do the research and write the articles that appear on this website. I’ve learned many household skills during my life and think it’s important to at least know the basics so that you can save yourself time and money… READ FULL BIO >