KitchenAid refrigerator ice maker troubleshooting can be a daunting task for many people. However, by following some simple steps, you can easily troubleshoot your ice maker and get it working again in no time.
- Ice maker turned off
- Ice maker jammed
- Check water supply line
- Water filter needs to be replaced
- Water system needs to be flushed
- Condenser Needs To Be Cleaned
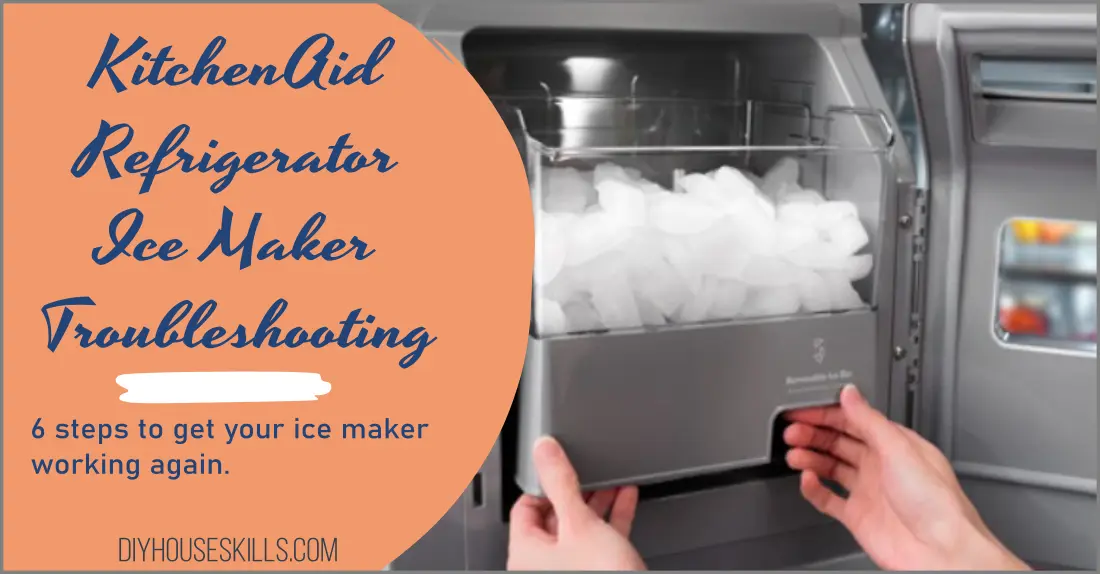
KitchenAid Refrigerator Ice Maker Troubleshooting
We’ll look at 6 things that may be the reason your KitchenAid ice maker isn’t working.
If your KitchenAid refrigerator’s ice maker is not working, it could be because:
1. Is Ice Maker Turned Off?
First, check to make sure that the ice maker is turned on. There is usually an on/off switch located near the ice maker. If it is turned off, turn it on and wait 24 hours to see if the ice maker starts working.
2. Is Ice Maker Jammed?
If the ice maker is turned on but not working, it may be jammed. To fix this, remove the ice tray and use a plastic utensil to help unjam the mechanism. Be careful not to force it, as you could damage the ice maker.
3. Check Water Supply Line
If the ice maker still does not work, check to see if there is water coming out of the water line. If there is no water coming out of the line, there may be a blockage or leak in the line.
Also, check the valve that controls the water supply to the ice maker. Trace the water supply line back to the wall where the valve is usually located. Make sure that it is turned on all the way.
4. Water Filter Needs To Be Replaced
If you have a water filter, it may need to be replaced. KitchenAid recommends that you replace the water filter every six months. The water filter is located inside the refrigerator, check your manual if you can’t locate it.
An old water filter will start to clog and decrease the amount of water it can output. This could result in no or small ice cubes being produced.
5. Water System Needs To Be Flushed
If you have installed a new water filter, you may need to flush the water system. KitchenAid recommends that you do this every time you replace the filter. To flush the water system, dispense up to 3 gallons of water to ensure that the water is clear and you have removed all air bubbles from the water line.
6. Condenser Needs To Be Cleaned
The location of the condenser coils will vary by model, but they are usually located either behind or under the refrigerator. If the coils are covered in dust or dirt, it will decrease the efficiency of the refrigerator and could cause issues with the ice maker. Clean the coils every 12 months.
To clean the coils, unplug the refrigerator and carefully vacuum the coils with a brush attachment. Once you have cleaned the coils, plug the refrigerator back in and wait 24 hours to see if the ice maker starts working again.
Common KitchenAid refrigerator models are: KRSF705HPS, KRMF706ESS, KRFF507HPS, KRFF300ESS, KRSC700HPS, KRSC703HBS, KRFC704FBS, KRFC704FPS, KRFC300EBS, KRFF305ESS.
ALSO READ: Samsung Ice Maker Defrosting Instructions
KitchenAid Ice Maker Not Working Red Light Blinking
If your KitchenAid ice maker has a red light blinking, it could mean that there is a problem with the ice maker mechanism. This means it could be jammed, the sensor is faulty or blocked, or the motor is damaged.
If the red light is blinking, unplug the refrigerator and then plug it back in. If the red light continues to blink, check that ice is not jammed in the unit. To do this, remove the ice bin and use a plastic utensil to help unjam the mechanism. Be careful not to force it, as you could damage the ice maker.
If the ice maker is still not working, call KitchenAid for further troubleshooting assistance.
How Do I Reset My KitchenAid Ice Maker?
For KitchenAid side-by-side refrigerators, locate the on/off switch which is on the ice maker itself. Turn it off, wait about 5 seconds and turn it back on. Next to the on/off switch is the reset button. Press the reset button to initiate a cycle of the ice maker. This will dump out any ice already inside the tray and then fill up the tray to make a new batch of ice.
How Long Does It Take To Make Ice In A New Refrigerator
Expect the ice maker to take a few hours to make a batch of ice, but wait up to 24 hours to make a few batches of ice and produce enough to use. Note that a newly installed refrigerator will also need time to cool the inside to the correct temperature for ice making. In general, expect about 3 pounds of ice in a 24-hour period.

I’m J.S., I created and am the content manager at DIYHouseSkills.com. I do the research and write the articles that appear on this website. I’ve learned many household skills during my life and think it’s important to at least know the basics so that you can save yourself time and money… READ FULL BIO >
Related Posts:
- DIY Secrets: Finding and Using the Bosch Ice Maker Reset Button
 How do I find and use the Bosch ice maker reset button? The Bosch ice maker reset button is typically located at the front or side of the ice maker unit. To reset your Bosch ice maker, press and hold the reset button for about 10 seconds until you hear a beep. This action will reset the system and should help resolve minor issues… Read more: DIY Secrets: Finding and Using the Bosch Ice Maker Reset Button
 - Say Goodbye to Stubborn Stains on Stainless Steel Pots
 Immediate Answer Effectively cleaning stainless steel pots involves a few straightforward steps. First, rinse the pot with warm water to remove any loose debris. Next, scrub with soapy water using a non-abrasive sponge. For tough stains, use a paste of baking soda and water or apply vinegar directly. Rinse thoroughly and dry completely to prevent water spots. To maintain their shine, avoid using abrasive… Read more: Say Goodbye to Stubborn Stains on Stainless Steel Pots
 - Effortlessly Remove Mold From Tile Grout with These Easy Steps
 Immediate Answer To effectively remove mold from tile grout, you need to follow a systematic approach that ensures both the mold is eradicated and future growth is prevented. The process involves using appropriate cleaning agents such as baking soda, borax, hydrogen peroxide, or specialized mold remover solutions, along with scrubbing the affected areas and taking preventative measures to maintain a dry and well-ventilated environment.… Read more: Effortlessly Remove Mold From Tile Grout with These Easy Steps
 - Proven Strategies to Unclog Your Kitchen Sink Efficiently
 Unblocking a kitchen sink can seem like a daunting task, but with the right tools and techniques, you can quickly restore your sink’s functionality without the need for professional help. This guide will walk you through a step-by-step process to unclog your kitchen sink using simple, effective methods. Quick Overview Here’s a quick, effective method to unclog your kitchen sink: For those who seek… Read more: Proven Strategies to Unclog Your Kitchen Sink Efficiently
 - Outlet Not Working, Breaker Not Tripped | Advice
 What To Do When Your Outlet Is Not Working But The Breaker Isn’t Tripped Experiencing an outlet that’s not delivering power can be perplexing, especially when the circuit breaker hasn’t been tripped. This common issue can often be resolved without needing to call an electrician. Here’s a quick rundown to help pinpoint and possibly fix the problem: Immediate Solution Note: This information applies to… Read more: Outlet Not Working, Breaker Not Tripped | Advice
