For DIY enthusiasts and novices, the power drill is a formidable ally, capable of transforming the most mundane tasks into victorious feats of creativity and precision.
Whether you’re a novice just starting your DIY journey or a seasoned enthusiast looking to refine your skills, this guide offers a tailored experience for every skill level.
Select the path that best describes your current knowledge and needs, and let’s drill down into the specifics.
- For the Beginner: Basics First
- For the Intermediate User: Enhancing Skills
- For the Expert: Mastery and Beyond
- Final Thoughts
Ready to drill down into the details? Here’s how to get started.
For the Beginner: Basics First
- Introduction to Power Drills: Understand what a power drill is and its primary functions.
- Safety First: Learn the essential safety protocols to prevent injuries.
- Getting to Know Your Drill: A guide to the different parts of a power drill and their uses.
- Choosing the Right Drill Bit: An overview of drill bit types and their applications.
- Simple Drilling Techniques: Step-by-step instructions for your first drilling tasks.
- Maintenance and Storage Basics: How to care for your drill when it’s not in use.
Introduction to Power Drills:
The power drill, in its various incarnations, is a staple of the DIY world. From corded to cordless, from the handheld to the monstrous impact driver, the drill offers a versatile range of applications. When beginning your mastery, recognizing the different types and their specialization is crucial.
- Corded Drills: Precision and power-packed into a cord-bound bundle, these are go-to’s for heavy-duty tasks.
- Cordless Drills: Freedom in each twist of the wrist – these mobile units are perfect for projects on the move.
- Impact Drivers: For the tougher nuts to crack, these specialized tools offer extra torque and driving power.
Whether you’re constructing a shelf or assembling IKEA furniture, there’s a drill varietal suited to your quest.
Preparing for Safe Use:
Before the buzz of the motor, there’s the quiet step of preparation. Ensuring that both your workspace and you are ready for action is a foundational element of safe and effective power drill use.
- Clear the Area: A tidy workspace is crucial. Eliminate anything you don’t want to drill through!
- Secure Your Space: Keep materials stable and clamp them if necessary to prevent movement.
- Know Your Material: Different substances require different bits – know the specifics before you bore.
Getting to Know Your Drill:
- Power Trigger: The main control for powering the drill.
- Forward/Reverse Switch: This switch determines whether the drill will rotate clockwise or counter-clockwise.
- Chuck: This is where you insert and secure different types of drill bits.
- Clutch Adjustment Ring: Used to adjust the torque setting of the drill.
- Motor: The powerhouse of the drill, responsible for providing the necessary force to rotate the bit.
- Battery Pack: For cordless drills, this is where the battery is inserted and stored.
- Grip Handle: Provides a comfortable and secure grip while using the drill.
Choosing the Right Drill Bit:
Different materials require different bits for optimal drilling results. Here are some common types of drill bits:
- Twist Bits: The most versatile and commonly used bit, suitable for drilling through wood, metal, plastic, and more.
- Spade Bits: Ideal for larger holes in wood and other soft materials.
- Masonry Bits: Designed specifically for drilling into concrete or brick.
- Forstner Bits: Used for drilling clean, flat-bottomed holes in wood.
Take note of the material you will be drilling into and choose the appropriate bit for best results.
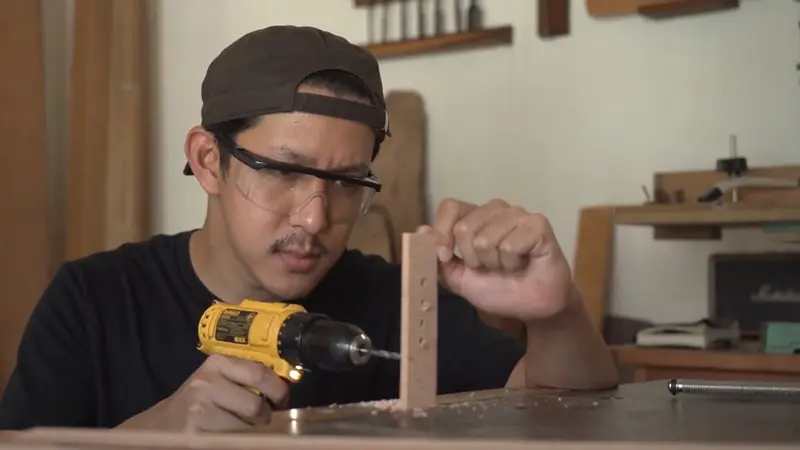
Simple Drilling Techniques:
Now that you have a grasp on your drill and its different components, it’s time to put it to work. Here are some basic drilling techniques to get you started:
- Mark Your Spot: Use a pencil or marker to mark the center point for your hole.
- Start Slowly: Begin drilling at a low speed and gradually increase as needed.
- Apply Steady Pressure: Hold the drill steady and apply consistent pressure while drilling.
- Use a Backing Board: For thinner materials, place a scrap piece of wood behind the material to prevent splintering.
- Pull Back Slowly: When removing the drill from the hole, pull back slowly to avoid damaging the material.
Operating the Power Drill:
With the basics covered, it’s time to power up. Knowing how to wield the tool is as important as knowing which to choose.
Finding Your Stance and Grip
- Good Posture: Stand with your feet shoulder-width apart to balance your frame and minimize strain.
- Firm Grip, Calm Mind: Hold the drill with one hand on the body and the other supporting the back end. Keep the power in your grasp – not your wrists.
The Need for Speed – and Direction
- Variable Speed: Adjust the drill to a speed that’s suitable for the material – high for metal, low for starting holes in wood.
- Go Right, Mostly Straight: For drilling, the clockwise direction is your friend; reverse to remove bits efficiently.
Maintenance and Storage Basics:
Proper care and storage of your power drill will ensure its longevity and effectiveness. Here are some basic tips for maintenance and storage:
- Clean After Use: Wipe down the drill with a clean cloth after each use to remove any debris or dust.
- Store in a Dry Place: Avoid storing your drill in damp or humid areas to prevent rust and damage.
- Keep Batteries Charged: For cordless drills, remember to charge the batteries regularly to ensure they are ready for use.
- Inspect Regularly: Check for any signs of wear or damage, and replace parts as needed.
With these basics in hand, you’re ready to take on the world of power drilling with confidence and skill. Remember to always prioritize safety and proper technique, and never be afraid to ask for help or advice from more experienced drill masters. Happy drilling! Keep expanding your knowledge by seeking out new projects and challenges, and don’t be afraid to experiment with different materials and techniques.
Quick Reference Guide to Mastering the Power Drill
| Section | Key Points |
|---|---|
| Introduction to Power Drills | Various types: Corded, Cordless, Impact Drivers. Essential for DIY projects |
| Preparing for Safe Use | 1. Clear the Area. 2. Secure Your Space. 3. Know Your Material |
| Getting to Know Your Drill | Parts: Power Trigger, Forward/Reverse Switch, Chuck, Clutch Adjustment Ring, Motor, Battery Pack, Grip Handle |
| Choosing the Right Drill Bit | Types of Bits: Twist, Spade, Masonry, Forstner. Match the bit to the material for optimal results |

For the Intermediate User: Enhancing Skills
- Advanced Safety Tips: Additional safety considerations for more complex projects.
- Drill Bits Deep Dive: More in-depth information on choosing the correct drill bit for specific materials.
- Mastering Drilling Techniques: Expanding your skill set with more advanced drilling techniques.
- Driving Screws Like a Pro: Tips and tricks for using your drill as a power screwdriver.
- Troubleshooting Common Issues: How to overcome typical problems encountered during drilling projects.
Building on the foundational skills of power drilling, the intermediate user seeks to enhance their abilities, tackling more complex projects with precision and confidence.
This section aims to elevate your drilling prowess, providing insights and techniques for those ready to take their skills to the next level.
Advanced Safety Tips:
Stepping up your drilling projects means taking your safety practices to a higher level. Here’s how to ensure you’re well-protected and prepared for more complex tasks, keeping it all friendly and straightforward:
- Suit Up for Success: Always wear appropriate safety gear. This includes safety glasses to protect your eyes from flying debris, gloves to guard against blisters and cuts, and ear protection if you’re working with particularly loud tools.
- Know Your Drill’s Lifeline: Be familiar with quick-stop features and the emergency off switch. It’s like knowing where the emergency exits are in a building – hopefully, you’ll never need it, but it’s crucial to know just in case.
- Inspect Before You Respect: Give your drill and bits a quick but thorough once-over before you start. Look for any damage or wear that could lead to problems once the drill is spinning.
- Clear the Area: Make sure there’s nothing lurking below your drilling surface that could cause issues, such as pipes, wiring, or even just a stubborn knot in wood. A quick scan or investigation can save a lot of headaches later.
- Stand Firm, Drill Calm: Keep your stance stable and your grip firm but gentle. Think of it as holding a bird – too loose and it flies away, too tight and… well, you get the idea. Balance is key.
By keeping these enhanced safety tips in mind, you’re setting yourself up not just for a successful project, but for a safer drilling experience. Always remember that a good crafter is a safe crafter. Now, with your safety gear on and knowledge in hand, you’re ready to drill with confidence and care.
Drill Bits Deep Dive:
Understanding the nuances of drill bits can transform your work. Explore bits designed for specific applications, such as cobalt bits for hardened steel or auger bits for deep wood drilling. Recognizing the right bit not only improves efficiency but also extends the lifespan of your tools.
Types of Drill Bits:
- For wood, you’ve got your spade bits (great for large, rough holes) and auger bits (ideal for deep, clean holes).
- Working with metal? Cobalt bits are your go-to for harder materials, while HSS (High-Speed Steel) bits can handle most general metal drilling tasks.
- And for our friends tackling masonry, a masonry bit with a tungsten carbide tip will do the trick, cutting through concrete like butter.
Size Matters:
- Yes, size does matter when it comes to drill bits. Start with a smaller bit to create a pilot hole, then move up to your desired size. It’s like sketching before you fill in the colors – it guides your way.
Keep It Sharp:
- A blunt drill bit is about as useful as a chocolate teapot. Keep your bits sharp using a bit sharpener or by replacing them regularly. Your drill (and your workpiece) will thank you for it.
Expert Tips and Clever Tricks:
- Hit Pause: When drilling into harder materials, take short breaks to prevent overheating. Think of it as giving your drill a little breather.
- Lubrication Leads to Elation: A drop of oil can smooth the drilling process, especially in metal. It reduces friction, meaning less heat and wear on your bit.
- A Clean Exit: To avoid breakouts and splinters when you’re about to break through the other side, ease up on the pressure and slow down. Patience is a virtue, after all.
- FAQ Fabulousness: Wondering how often you should replace your drill bits? It depends on usage and material type, but at the first sign of dullness or damage, consider swapping out to maintain top-notch performance.
Remember, the secret to successful drilling isn’t just about the power you wield, but knowing which bit fits the bill.
Mastering Drilling Techniques:
Elevating your drilling game is all about mastering a few clever techniques and adopting a mindset ready for detail and precision. Whether it’s angling for the perfect joinery or ensuring your holes are spot-on, these strategies will upgrade your projects from good to great.
Angling for Perfection:
- When creating angled holes for joinery, the key is consistency. Use a guide or jig if you can. It acts like a friend holding your hand, ensuring you don’t go astray.
- Tip: If you’re making multiple angled holes, consider a template made from scrap wood to keep your angles consistent and accurate.
Starting on the Right Foot (or Bit):
- Begin every hole with a center punch or a small pilot drill bit. This little pre-step marks the spot for your drill, so it doesn’t dance around on the surface.
- Question: How do I avoid the drill bit from wandering?
- Answer: Using a center punch creates a small indent for the drill bit to sit in, guiding it straight and true.
The Art of Peck Drilling:
- Ideal for metal, peck drilling involves drilling a bit, pulling out to remove debris, then drilling a bit more. It’s like the rhythm of a dance – in, out, repeat.
- Why do it? It keeps your drill bit cooler and clears out debris, which prevents clogging and overheating.
Keeping It Cool:
- Overheating can take a toll on your drill bits and the material. If drilling metal, a drop of oil can help keep things cool. In wood, frequent breaks will do the trick.
- Question: How can I tell if my drill bit is too hot?
- Answer: If you see discoloration (bluing) on the bit or if it’s too hot to touch after pulling out, give it a break. Literally, and figuratively.
Smooth Exits:
- To avoid blowouts or unsightly splinters when the bit exits the material, back off the pressure and slow down as you complete the hole. It’s a gentle goodbye.
- Tip: Consider placing a scrap piece of wood behind your workpiece to support the exit area and minimize tear-out.
By incorporating these nuanced techniques into your drilling routine, not only will your efficiency skyrocket, but you’ll also see a noticeable uptick in the quality and precision of your work.
Driving Screws Like a Pro:
Navigating the intricacies of screw driving with precision and skill can dramatically enhance the quality of your projects. Just as with drilling, the art of screw driving requires a tailored approach depending on the screw type, material, and desired outcome. This section will guide you through achieving seamless, efficient screw driving every time.
Clutch Control Mastery:
- The clutch setting on your drill is crucial for driving screws to the exact depth. It’s like finding the perfect volume on your stereo—not too loud, not too soft. Experiment with different settings to avoid driving screws too deep or, conversely, leaving them protruding.
The Right Speed and Pressure:
- Each screw and material combo has its sweet spot. Start slow, then gradually increase speed and pressure until you find the perfect balance that drives the screw snugly without stripping the head or splintering the wood.
Piloting the Way:
- Making pilot holes may seem like an extra step, but it’s a game-changer. It’s akin to drawing the path before you walk it—guiding the screw in smoothly and ensuring it goes in straight without splitting the material.
The Importance of the Correct Bit:
- Using a bit that matches the screw head exactly is like choosing the right key for a lock. It ensures a snug fit, reducing the risk of stripping the screw and making the drive more efficient.
Avoiding Material Split with Pre-Drilling:
- For tough or brittle materials, pre-drilling is your best defense against splits and cracks. It’s preparing the runway for a smooth landing, ensuring the material welcomes the screw without resistance.
FAQ on Screw Driving Savvy:
- Question: How often should I check my drill’s torque settings?
- Answer: Before starting your project and periodically during, especially when switching between different materials or screw sizes. Regular adjustments ensure you’re always driving screws with optimal force.
By enhancing your screw-driving technique through these strategic measures, your projects will not only exhibit flawless assembly but also stand the test of time.
Troubleshooting Common Issues:
Addressing challenges head-on with a methodical approach can significantly streamline your workflow and elevate your craft. The pathway to becoming a troubleshooter par excellence involves understanding the nuances of each issue, be it a drill bit that has decided to make a stand or a material that refuses your advances. This section is your compass to adeptly navigating the common pitfalls of drilling and screw driving, ensuring a smooth progression of your projects.
Liberating a Stuck Bit with Finesse:
- Much like an artist tactfully removing a stubborn brush from a canvas, freeing a stuck bit requires a blend of gentle persuasion and the right technique. Apply slight reverse torque while providing lubrication if necessary. It’s the delicate art of knowing when to push and when to coax.
Mastering Material Penetration:
- When faced with a material that seems impenetrable, reassess your tools and technique. Ensure you’re using the appropriate bit and applying sufficient pressure. It’s akin to selecting the right chisel for a specific stone, where precision meets force.
Achieving Uniform Holes:
- Inconsistencies in hole size or depth can mar the aesthetics and functionality of your project. Treat each hole like a unique masterpiece, requiring its own setup and approach. Use stops or depth gauges to ensure uniformity, mirroring the meticulous attention of a sculptor to their craft.
Resolving Uneven Drill or Screw Insertions:
- Addressing the challenge of uneven insertions starts with understanding the why. Adjust your technique, check for equipment wear, and ensure your material is securely fastened. Each action is a step toward perfect alignment, as critical as the foundation of a building.
FAQ for Advanced Troubleshooting:
- Question: What should I do if I notice my drill bit dulling unusually fast?
- Answer: Assess the material you’re working with and confirm you’re using the right bit type. A dull bit needs replacing or sharpening – it’s essential to keep your tools in peak condition, as a chef sharpens their knives.
By assimilating these advanced troubleshooting techniques into your practice, you elevate from merely managing problems to preemptively strategizing against them. Your projects evolve from being tasks to becoming testaments to your skill in overcoming obstacles. This shift not only refines your output but transforms challenges into opportunities for growth and innovation.

For the Expert: Mastery and Beyond
- Exploring Advanced Drill Features: Understanding the advanced functionalities of high-end drills.
- Precision Drilling: Techniques for achieving precise results in varied materials.
- Specialty Drill Bits: An introduction to specialized drill bits for unique projects.
- Creating Custom Holes and Fastenings: Advanced techniques for custom projects.
- Long-Term Drill Care and Maintenance: Ensuring longevity and peak performance of your drill.
Exploring Advanced Drill Features:
To elevate your craftsmanship, a deep understanding of your drill’s advanced features is essential. By optimizing these functionalities, you can tackle complex projects with greater ease and precision. Below is a concise guide to leveraging these advanced drill attributes effectively:
- Torque Settings Mastery: Adjust torque to suit the material and task at hand, minimizing wear on your bits and preventing damage to workpieces.
Specialized Modes Utilization:
- Hammer Mode: Ideal for drilling into masonry or concrete, enhancing penetration with less effort.
- Driver Mode: Optimizes the drill for driving screws, ensuring efficient and secure fastening.
- Drill Mode: Best for straightforward drilling tasks, offering unencumbered rotational speed.
- Speed Selection: Adapt the drill speed to the material’s density and the bit’s size for clean, precise holes.
- Depth Setting: Use depth stops to achieve consistent hole depths, a must for uniform appearances in your projects.
- Auxiliary Handles: For drills equipped with them, leverage auxiliary handles to improve stability and control during demanding tasks.
Integrating these advanced strategies into your workflow not only streamlines the process but also enhances the quality and durability of your finished projects.
Precision Drilling:
For the seasoned craftsman aiming to perfect their precision drilling results, advanced techniques and tools are indispensable. Elevate your precision drilling with the following expert strategies:
- Utilize Precision Tools: Implement the use of digital calipers and laser guides to accurately mark drilling locations. Precision begins with exact measurements.
- Drill Bit Selection: Carefully select your drill bits based on the material type and hole size required. Invest in a wide variety of quality bits, including cobalt, carbide, and HSS (High-Speed Steel) for different applications.
- Depth Stops Mastery: Consistently use depth stops or drilling jigs to control drill bit penetration, ensuring each hole is uniform. This is crucial for projects requiring high levels of symmetry or alignment.
- Speed Variation Technique: Adjust your drill speed based on the material’s hardness and the bit’s diameter. Lower speeds for metals, higher for wood—this maximizes bit efficiency and minimizes errors.
- Use of Pilot Holes: For materials prone to splitting or when working with large-diameter bits, pre-drilling pilot holes can significantly enhance control and accuracy.
- Steady Hand, Steady Results: Even with advanced tools, the importance of maintaining a firm and steady grip cannot be overstated. For drills without an auxiliary handle, consider using a drill stand to eliminate wobble.
- Post-Drilling Practices: Finish with deburring tools for metalwork or sanding bits for wood to ensure clean, professional results. This step is often overlooked but critical for precision work.
By adopting these refined techniques, the expert craftsman will not only achieve greater precision in their drilling endeavors but also enhance the overall quality and integrity of their projects.
Specialty Drill Bits:
For experts aiming to expand their versatility and precision in drilling, understanding and utilizing specialty drill bits is paramount. Each bit is engineered for specific tasks, enabling you to achieve exceptional results in various materials and applications. Enhance your expertise with these insights and tips on specialty drill bits:
Spade Bits:
- Use Case: Ideal for cutting large, flat-bottomed holes in wood.
- Expert Tip: To prevent splintering on the exit side, place a sacrificial piece of wood beneath your workpiece.
Auger Bits:
- Use Case: Perfect for boring deep, clean holes in wood, offering efficient chip removal and reduced binding.
- Expert Tip: Maintain a steady, moderate speed to ensure smooth cuts and prevent overheating.
Forstner Bits:
- Use Case: Produces precise, flat-bottomed holes in wood, excellent for cabinetry and woodworking where clean finishes are required.
- Expert Tip: Use a drill press for optimal precision, especially when drilling at angles or into end grain.
Hole Saws:
- Use Case: Designed to cut large-diameter holes in various materials, including wood, metal, and plastic.
- Expert Tip: Apply cutting oil when working with metals to extend the life of your hole saw.
Masonry Bits:
- Use Case: Equipped with a tungsten carbide tip to drill into concrete, brick, and stone.
- Expert Tip: Use with a hammer drill to enhance penetration and efficiency in tough masonry.
- Cobalt, Carbide, and HSS (High-Speed Steel) Bits:
- Use Case: Each has its application with cobalt and carbide being harder, ideal for metalwork, while HSS offers versatility for different materials.
- Expert Tip: Match the bit not only to the material but also consider the speed and feed rate for optimal performance.
By incorporating these specialty drill bits into your toolkit, you not only broaden the scope of your projects but also enhance the precision and quality of your work.
Creating Custom Holes and Fastenings:
For the craftsman looking to distinguish their work with unparalleled precision and customization in holes and fastenings, mastering advanced techniques and employing creative solutions are key. Elevate your craft with the following strategies and tips:
Angled Drilling Techniques:
- Strategy: Utilize adjustable angle guides or drill press accessories to achieve precise angled holes.
- Expert Tip: When drilling at unconventional angles, secure your workpiece firmly to prevent movement, and practice the angle on scrap material first to ensure accuracy.
Custom Bit Modification:
- Strategy: Modify drill bits to suit specific tasks, such as sharpening angles or shortening lengths.
- Expert Tip: Keep a variety of spare bits for experimentation. Use a bench grinder carefully to alter the bit, and always wear protective eyewear.
Multi-Step Drilling Process:
- Strategy: Employ a stepwise approach for complex hole shapes, starting with pilot holes and gradually increasing to the desired size or shape.
- Expert Tip: Use increasingly larger bits for multi-step drilling to maintain control and precision. Consider using custom-made jigs to guide each step accurately.
Creating Threaded Holes and Inserts:
- Strategy: Utilize taps and dies for metal projects to create custom threads or repair stripped threads.
- Expert Tip: Apply cutting fluid liberally to both the tap and the workpiece to prevent binding and breaking. Begin with a slightly smaller hole than the final thread size requires.
- Innovative Fastening Solutions:
- Strategy: Explore alternative fastening methods, such as riveting or the use of adhesives, for materials where traditional screws and bolts may not suffice.
- Expert Tip: For materials sensitive to heat or prone to cracking, consider adhesive bonding with structural adhesives or using blind rivets for added strength without the need for hole penetration on both sides.
By integrating these advanced strategies and tips into your woodworking or metalworking practices, you can achieve a higher degree of customization and precision in your projects, setting your work apart in both aesthetics and functionality.
Long-Term Drill Care and Maintenance:
Consistent performance is the hallmark of a well-maintained drill. Regular cleaning, proper storage, and timely replacement of worn-out parts are essential practices.
Your drill is more than just a tool – it’s an asset. Treat it well with proper storage and regular upkeep, and it’ll reciprocate your care with longevity and reliability.
Storing with Care
- Dry and Dust Free: Moisture and sawdust are the drill’s kryptonite. Store it in a dry, clean place.
- Battery TLC: For cordless drills, keep lithium-ion batteries in peak condition by charging and discharging them at least every three months.
A Toolbox With Balance
- Tool Organization: A chaotic toolbox leads to mistreatment. Invest in a tool organizer for your drill and accessories.
- Balancing Act: Store your drill vertically to ensure oils and lubricants remain evenly distributed.
Regular cleaning, oiling, and part replacements ensure that every time you pick up your drill, it’s ready to perform as if fresh from the factory.
Final Thoughts
- Safety Revisited: Regardless of your experience level, safety must always be the top priority. Always wear appropriate protective gear, and ensure your workspace is secure and well-lit. Revisiting safety protocols periodically will help mitigate the risks of injury.
- Beyond the Drill: Mastery of the power drill opens the door to a wider world of DIY possibilities. Consider broadening your toolkit with additional power tools, such as circular saws, sanders, and routers, to expand your project capabilities.
- Community and Learning: The path to DIY mastery is a continuous learning journey. Engage with online forums, attend workshops, and seek out instructional content to keep your skills sharp and stay updated on the latest techniques and tools in the field. Remember, the DIY community is vast and supportive – a valuable resource for encouragement, advice, and inspiration.

I’m J.S., I created and am the content manager at DIYHouseSkills.com. I do the research and write the articles that appear on this website. I’ve learned many household skills during my life and think it’s important to at least know the basics so that you can save yourself time and money… READ FULL BIO >