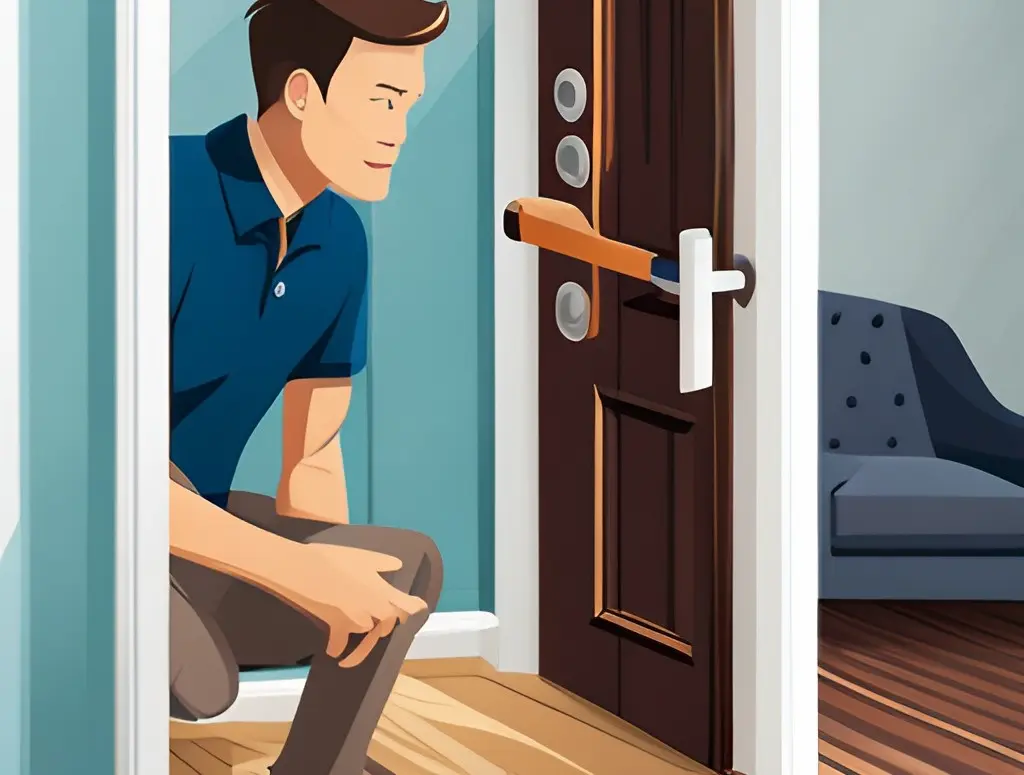
With over 20 years of experience as a homeowner and professional, I understand the frustration that comes with dealing with malfunctioning door locks.
From sticky locks to misaligned strike plates, this article aims to assist homeowners like yourself in identifying, troubleshooting, and resolving common door lock issues. Through step-by-step guides, case studies, and practical solutions, you’ll be equipped to restore your door lock to full functionality in no time at all.
- Preparing for Action: Before We Dive In
- Issue 1: Solving the Sticky Door Lock Situation
- Issue 2: Tackling the Misaligned Door Latch
- Issue 3: Solving Loose Door Locks
- Issue 4: Frozen Door Locks
- Issue 5: Resolving the Issue of a Broken Key
- Issue 6: Addressing Worn-Out Keys or Locks
- Issue 7: Handling Internal Lock Mechanism Failures
- Issue 8: Key Turns But Doesn’t Unlock
- Issue 9: Overcoming a Jammed Keyhole
- Issue 10: Addressing Door Swelling or Shrinking
- Issue 11: Handling Rust-Clogged Locks
- Issue 12: Addressing Problems with Incorrectly Installed Door Locks
- Issue 13: Dealing with Worn-Out Tumblers
- Frequently Asked Questions (FAQs)
- Final Thoughts and Recommendations
You’ve got a busy life and don’t need the additional headache of a malfunctioning door lock.
We cover 13 common door lock issues and will provide a comprehensive, step-by-step troubleshooting guide for each one. Let’s get started.
Preparing for Action: Before We Dive In
Before we dive into the nitty-gritty of fixing door locks, let’s set the stage right. The beauty of these tips is that they are designed for people of all skill levels – you don’t need to be a seasoned locksmith to apply these solutions.
However, you will need a basic set of tools: a screwdriver, and possibly a set of needle-nose pliers for stubborn cases. Also, patience is key (pun intended) – some of these problems may require a bit of time and trial-and-error to resolve.
Stay patient and remember, safety first. Lastly, while these tips are meant to help you handle common door lock issues, remember that there’s no shame in calling a professional if things get too tricky.
Issue 1: Solving the Sticky Door Lock Situation
Let’s dive right in. A sticky lock can be a minor annoyance that quickly escalates into a major inconvenience. But don’t fret, armed with the right knowledge and some household tools, you can get that stubborn lock working smoothly in no time.
The culprit behind sticky door locks is usually accumulated dirt or grime which gums up the internal mechanism.
Here’s a comprehensive, yet straightforward guide to dealing with sticky locks:
- Identify the Problem: First, confirm that the stickiness isn’t due to a warped door or a misaligned latch. If the door and latch are fine, then it’s likely the lock that’s causing trouble.
- Gather Your Tools: You’ll need a can of graphite powder (your knight in shining armor for sticky situations), a key you don’t mind getting dirty, and a clean cloth to wipe off excess graphite. You can purchase graphite powder at your local hardware store.
- Use Graphite Powder: Squirt a small amount of graphite powder directly into the keyhole. Graphite is ideal for locks because it’s dry and won’t attract more dirt. Think of it as the ‘anti-stick’ for sticky locks.
- Distribute the Graphite: Insert your key into the lock and wiggle it around a bit to help distribute the graphite. Picture yourself stirring a small pot of soup. This step is essential to ensure the graphite reaches all the nooks and crannies inside the lock.
- Repeat as Necessary: If the lock is stubborn, repeat steps 3 and 4 a few times. Patience is key; it might take a couple of tries before the lock returns to its smooth operation.
- Clean Up: Use the clean cloth to wipe off any excess graphite from the key and the lock. After all, cleanliness is next to godliness, even when it comes to door locks!
Remember the time when you couldn’t open that jar of pickles and had to tap it, run it under hot water, and perhaps even sweet-talk it? Well, think of your sticky lock as that jar of pickles. But instead of brute force or warm water, you have graphite powder. And just like the satisfaction of finally popping open the pickle jar, you’ll feel a sense of accomplishment once your sticky door lock turns smoothly. Just follow these steps, and you’ll be back to your day in no time.
Also Read: Boost Your Home’s First Impression: DIY Ideas for Enhancing Curb Appeal
Common Misconception: Using Oil or Lubricants on Door Locks
Many of us instinctually reach for a can of WD-40 or similar lubricants when we encounter a stubborn, sticky lock. After all, if it works for squeaky hinges and rusted bolts, why not for door locks?
Let me tell you why that’s not the best idea.
Oils and lubricants might seem like the perfect solution, but they can actually compound the problem in the long run.
- These substances are sticky and attract dust, dirt, and grime, creating a grit-like substance inside the lock.
- Over time, this dirt-oil combo turns into a kind of sludge that can gum up the lock’s mechanism even more—leaving you wrestling with a problem that’s worse than you started with.
Graphite powder, on the other hand, is a dry lubricant. It does the job of making the lock smoother without attracting dirt or other particles. Think of it as the Marie Kondo of door locks—it doesn’t invite or accumulate unnecessary stuff.
So, while your initial instinct might be to reach for a liquid lubricant, remember that sometimes, the dry solution is indeed the best one.
To share a real-life example, I once had a key that had become increasingly harder to turn, and eventually, the lock seized up completely. I took the lock apart and found a thick layer of grime inside—much like the gunk that builds up in an engine if it’s not serviced regularly. I cleaned out the lock and applied graphite powder, and the lock has been turning smoothly ever since.
So, remember—when it comes to door locks, graphite powder is your best friend. It’s a simple, clean, and effective solution to keep your locks turning smoothly.
Issue 2: Tackling the Misaligned Door Latch
Let’s jump into our next common predicament – the misaligned door latch.
A misaligned door latch is a common issue that most homeowners encounter at least once. It occurs when the door latch does not correctly align with the hole in the strike plate on the door frame.
When this happens, the door might not close properly or might require an extra push or pull to secure it. It can be caused by factors like temperature changes, which can make the door frame expand or contract, or natural settling of the house over time. It’s like trying to thread a needle when the eye keeps moving – it’s doable, but requires more effort and can be quite frustrating.
But don’t worry, there’s a straightforward fix before you find yourself sanding down your beautiful door frame. Here’s your easy-to-follow guide to re-aligning that pesky door latch:
- Identify the Problem: First, you need to determine how the latch is misaligned. Close your door slowly while watching the latch go into the strike plate. Does it strike the top or the bottom, or does it miss completely?
- Gather Your Tools: To tackle this issue, you’ll need a screwdriver, a chisel, and a hammer. Don’t worry if you’ve never used a chisel before – I’ll guide you every step of the way.
- Adjust the Strike Plate: Unscrew the strike plate and reposition it to where the latch properly aligns. If the misalignment is minor, you might be able to just loosen the screws, move the strike plate, and tighten the screws again.
- Re-chisel the Mortise: If the strike plate needs to move a lot, you may need to chisel a new mortise (recess) for it. Keep your hands steady, take your time, and remember: it’s easier to remove extra wood later than to put it back.
- Check Alignment: Once you’ve repositioned and reinstalled the strike plate, close the door. The latch should now align with the strike plate and the door should close easily.
- Repeat as Necessary: If the door doesn’t close easily, repeat the steps again. The key to a perfectly aligned latch is patience and precision.
I remember when my front door latch was misaligned, the door wouldn’t close. After repositioning the strike plate and a little chiseling, my door closes smoothly every time. If I can do it, so can you. Just follow these steps and you’ll have your door closing properly in no time. Don’t let a misaligned latch throw a wrench in your day – you’ve got this.
Also Read: From Chaos to Calm: Effective Strategies for Decluttering and Organizing Your Home
Issue 3: Solving Loose Door Locks
Loose door locks can present a frustrating and potentially unsafe situation. This usually happens when the screws holding the lock in place start to lose their grip, causing the lock and knob to wobble or, in the worst cases, fail to operate entirely.
It’s like trying to open a soda bottle with a loose cap – the harder you twist, the less it seems to respond. But don’t despair.
Here’s your handy guide to tightening that lock back into place:
- Diagnose the Problem: First, wiggle your door knob or handle. If it’s loose, the screws securing the lock are likely the problem. Also, check the plate on the edge of the door where the latch bolt protrudes.
- Gather Your Tools: To fix a loose door lock, you’ll need a screwdriver. Be sure to choose the right type (Phillips or flat) that matches the screws on your door lock.
- Tighten the Screws: Unscrew the plate (also known as the rose), tighten the screws, and then replace the rose. Ensure you tighten the screws evenly to prevent the lock from becoming crooked.
- Test the Lock: After you’ve tightened everything, test the door knob or handle again. It should feel firm and operate smoothly – just like new.
I recall the time my patio door’s lock came loose. It felt wobbly, and it was a struggle to secure the door. All it took was a screwdriver and a few minutes of my time. Now, the lock operates smoothly and securely.
Issue 4: Frozen Door Locks
Just as winter graces us with its frosty presence, it also brings along the trouble of frozen door locks. You might be rushing out to work, to find your key refusing to cooperate with the lock, thanks to the sneaky ice.
I’ve experienced this, and trust me, nothing screams ‘winter woes’ more than a key stubbornly stuck in the frozen fortress of a lock. But don’t fret! We’ve got a simple step-by-step guide to rescue your key from the icy jaws of your door lock:
- Diagnose the Problem: If your key doesn’t easily turn in the lock, double-check to ensure it’s not a mechanical issue first. If it’s indeed a frosty lock, let’s move on to the thawing process.
- Gather Your Tools: You’ll need a source of heat – a hairdryer works best. If you’re locked out, a lighter and a thin, metallic object, like a heated key or a screwdriver, can also do the trick.
- Defrost the Lock: Warm the key with your chosen heat source and then slowly insert the warmed key into the lock. Be gentle and patient; too much force can result in a broken key. Repeat the process until you can turn the key.
- Test the Lock: After the ice has melted, try turning your key in the lock. It should glide smoothly, just like opening a warm jar of your favorite jam.
So, don’t let the cold lock you out, arm yourself with these steps and show winter who’s boss.
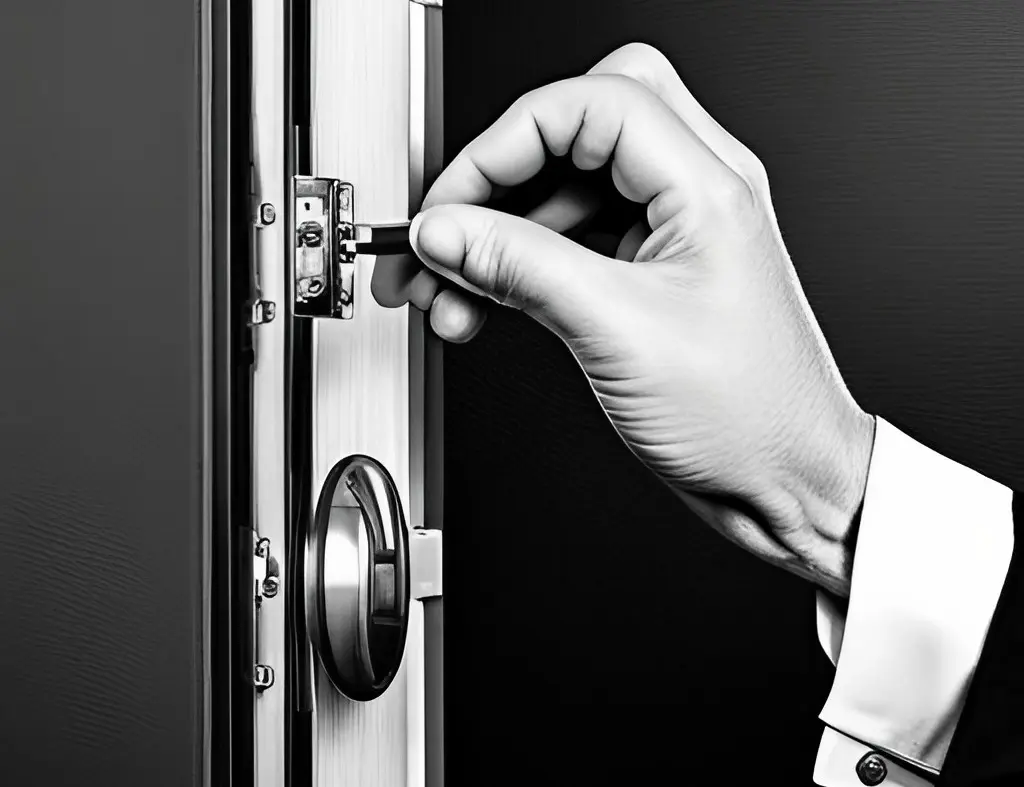
Issue 5: Resolving the Issue of a Broken Key
A broken key is every homeowner’s nightmare. You’ve had a long day, you’re just about to unlock your door, and snap! The key breaks, leaving a piece of it stuck stubbornly in the lock.
This can feel like a mini heart attack, but don’t panic, I’ve been there. If you follow these steps carefully, you can successfully extract the broken piece and regain access to your home:
- Identify the Problem: If your key doesn’t turn and breaks instead, you’ve got a broken key situation. Half part of the key is in your hand while the other half is lodged in your lock.
- Prepare Your Toolkit: To remove the broken key, you’ll need needle-nose pliers or tweezers, and a thin, sturdy piece of metal like a straightened bobby pin or a broken saw blade. Remember, safety first – wrap the end of the metal piece with tape to prevent any cuts.
- Extract the Broken Key: Insert your chosen tool into the lock, trying to slide it against the broken key’s cuts. Turn the lock back to the unlock position gently, and hopefully, the broken piece will come out.
- Double-check the Lock: Once you’ve successfully extracted the broken piece, test the lock with a spare key. It should operate smoothly.
Patience is key here (no pun intended). So breathe, take your time, and don’t apply too much force. You’ve got this, and soon you’ll be relaxing inside the comfort of your home.
Issue 6: Addressing Worn-Out Keys or Locks
Just as time leaves its mark on all things, your keys and locks aren’t immune to this inevitability. With constant use, keys may gradually fail to engage the lock properly, or the lock itself may become faulty.
It’s akin to trying to fit a worn-out puzzle piece into its place – it simply doesn’t click. I, too, have been in this situation where the key felt like a stranger to its lock, refusing to fit in smoothly. But don’t worry, with the right approach, you can easily resolve this issue.
Let’s walk through the steps together:
- Identify the Issue: If your key struggles to fit into the lock or the lock seems unyielding, it is likely due to wear and tear.
- Gather Essential Tools: To fix worn-out keys or locks, you might need a new key or, in some cases, a new lock.
- Take the Next Step: If it’s the key, try using a spare key first. If the lock is the issue, it might need to be replaced. In both cases, consulting with a professional locksmith is recommended.
- Test the Solution: After you’ve replaced the worn-out key or lock, test it to ensure smooth operation. The key should slide in easily and turn the lock without resistance.
Further Steps for Dealing with Worn Keys
If your key is still causing problems after replacing it with a spare, there are a few more things you can try. These methods have helped me in the past, and they might just be the solution you’re looking for.
- Try Lubricating the Lock: A dry lock can cause a key to wear more quickly. You can solve this by applying a silicone-based lubricant or graphite to the lock. This helps the key turn smoothly and reduces wear and tear.
- Rekey the Lock: If you’ve replaced the key and the problem persists, you might need to rekey the lock. This process involves changing the lock mechanism so it can work with a new key. It’s a more cost-effective solution than replacing the entire lock. However, this task is better left to professional locksmiths.
- Copy the Original Key: If you have the original key that came with the lock, you can make a copy of it. Copies made from copies tend to develop inaccuracies, which can cause the key to wear out more quickly.
- Upgrade to a Keyless System: If your keys keep wearing out, it might be time to consider upgrading to a keyless system. Key codes can’t wear out, and you’ll never have to worry about losing your keys.
Remember to always test your lock after making any adjustments. A well-functioning lock should accept the key without resistance, and the key should turn easily.
Don’t be discouraged if the first solution you try doesn’t work. Persistence pays off, and soon enough, you’ll have a key and lock that work smoothly together.
Issue 7: Handling Internal Lock Mechanism Failures
There’s nothing more frustrating than fiddling with a lock that refuses to work due to internal mechanism problems. Trust me, I understand the feeling.
Below, I’ve outlined a series of steps that you can follow to diagnose and fix this problem. Remember, patience, and precision are key here (pun intended again).
- Identify the Issue: If your key fits into the lock but doesn’t turn, or turns but doesn’t unlock, or the lock operates intermittently, then you are most likely dealing with an internal mechanism failure. It’s like a clock with a jammed gear – the hands just won’t move.
- Gather Your Tools: Dealing with an internal mechanism failure may require specialized tools like a screwdriver, appropriate lock picks, and a follower tool if you choose to attempt a DIY repair.
- Try to Fix the Lock: You can attempt to pick the lock yourself to diagnose the internal issue or employ the services of a professional locksmith. However, due to the complex nature of some locks, I’d recommend reaching out to a pro.
- Test the Lock: After the internal mechanism has been repaired, it’s time to test the lock. Insert your key and turn it. The lock should now operate smoothly.
Remember, while DIY solutions can be rewarding, the intricate workings of a lock can be difficult to navigate without professional knowledge. Don’t hesitate to involve a professional locksmith when faced with internal lock mechanism failures.
See Also: How To Conserve Water At Home | How Can I Lower My Water Bill?
Issue 8: Key Turns But Doesn’t Unlock
This problem is typically due to a malfunction within the lock’s internal mechanism or an issue with the key itself. The good news? It’s fixable, and I’m going to guide you through it.
Let’s break down the steps we need to take:
- Diagnose the Problem: The first task on your list is to identify the root of the issue. If your key turns in the lock but doesn’t engage the bolt or latch, it’s likely an internal mechanism problem. If the key seems to “spin” in the lock without resistance, the key itself could be the issue.
- Assemble Your Tools: Depending on the problem, the tools you’ll need might vary. A new key may be required, or in some cases, you might need basic lock-picking tools like a tension wrench and pick, especially if it’s an internal mechanism fault.
- Take The Next Steps: If it’s the key, you might need a replacement. If the lock is the issue, you could try to disassemble it and check the internal components, but this can be quite complex. To avoid causing further damage, I recommend bringing in a professional locksmith.
- Test Your Solution: Once the issue has been addressed, it’s time to give your key and lock a spin, literally. Insert your key and turn it. The lock should now unlock smoothly with no resistance.
Additional Solutions When Key Turns But Doesn’t Unlock
Encountered a stubborn lock where the key turns but doesn’t unlock? Don’t worry. Here are some further steps you can take:
- Check the Door and Hinges: Sometimes, the issue has nothing to do with the lock or key itself but lies with the door. If the door or its hinges have shifted due to changes in temperature or humidity, it could prevent the lock bolt from fully retracting. Check if the door is hanging evenly and adjust the hinges if necessary.
- Use a Graphite Spray Lubricant: The internal pins of the lock might be stuck, making it difficult for the key to engage and disengage the lock. A graphite spray lubricant can help in such cases. Spray a small amount into the lock, then insert and remove the key a few times to distribute the lubricant.
- Try a Bump Key: A bump key can potentially realign the pins inside the lock. Be aware, though, that this method is considered lock picking and should only be used on locks that you own. Also, it requires a bit of practice to get right, so it may not be suitable for everyone.
- Consider Partial Disassembly of the Lock: If you’re handy with tools, you could try disassembling the lock to check the internal components. Look for any broken parts or things that seem out of place. If anything looks worn or broken, that’s likely the source of your problem.
- Contact a Locksmith: If all else fails, it’s time to call in the professionals. A locksmith has the necessary tools and expertise to diagnose and fix a broad range of lock issues. Plus, they can provide you with tips on preventing similar problems in the future.
Remember, treating your locks with care and performing regular maintenance can prevent many common lock problems. But when issues arise, knowing the steps to diagnose and fix them can save you time, money, and frustration.
Issue 9: Overcoming a Jammed Keyhole
A jammed keyhole can be a real headache. When debris or foreign objects lodge themselves into the keyhole, it can prevent your key from fitting or turning in the lock. But here’s the good news: I’m going to walk you through how you can tackle this issue.
- Recognize the Problem: A keyhole is jammed if your key can’t fit into the lock, or if it fits but refuses to turn. Signs of blockage can be visible debris or difficulty inserting the key.
- Prepare Your Tools: To deal with a jammed keyhole, you’ll need a few simple tools. These may include a lock lubricant, a compressed air canister, or a thin piece of metal or wire for manual cleaning.
- Apply the Solution: Spray the lock lubricant or compressed air into the keyhole. These are designed to flush out the debris. If the blockage persists, you might need to use a thin piece of metal or wire to gently remove the obstruction.
- Test the Lock: After successfully removing the debris, it’s time to test the lock. Slide your key in and turn it in. The key should now rotate freely.
Remember, sometimes, solving a problem might seem easy, but if you feel overwhelmed or unsure at any point, there’s no shame in calling a professional locksmith.
Issue 10: Addressing Door Swelling or Shrinking
Weather changes and fluctuations in humidity can have a direct impact on your doors, resulting in swelling or shrinking. This, in turn, can lead to misalignment with the lock and latch, making it difficult to secure the door. Here’s a user-friendly guide to help you navigate this issue:
- Identify the Problem: If you find your door sticking or jamming and you’re having trouble locking or unlocking it, that’s a clear sign your door has likely swollen or shrunk. This is particularly common in areas with high humidity or drastic temperature changes.
- Gather Your Tools: To remedy this issue, you’ll need a few tools. A plane to shave down the swollen areas of the door, a screwdriver to adjust the hinges, and sandpaper to smooth out the edges may be necessary.
- Implement the Solution: If the door has swelled, use the plane to gently shave down the edges until it fits properly. If it has shrunk, adjusting the hinges may help realign the door with the latch. Sand down any rough edges for a clean finish.
- Test Your Fix: After you’ve made adjustments, it’s time to see if the problem is solved. Try locking and unlocking the door. It should now move freely and align correctly with the lock and latch.
Issue 11: Handling Rust-Clogged Locks
A rusty lock can be quite a nuisance, as it can make turning the key difficult and cause the lock to stick. However, don’t despair. With a bit of work, you can have your rusty lock working smoothly again. Let’s dig into it:
- Spot the Issue: If you’re finding it tough to turn the key or if the lock is sticking, there’s a good chance rust is the culprit. Rust can accumulate over time, especially in locks that are exposed to the elements, impeding the mechanism’s smooth operation.
- Gather Your Tools: To combat rust, you’ll need some key items. These include a can of WD-40 or a similar rust remover, a toothbrush for scrubbing, and perhaps a replacement lock if the rust is too severe.
- Apply the Solution: Spray the rust remover into the keyhole, then let it sit for a few minutes to break down the rust. Use the toothbrush to scrub away any loose rust. Repeat this process until the lock looks clean. If the rust is severe, it might be time to consider replacing the lock.
- Test Your Solution: After the cleaning process, it’s time to see if the lock is now functioning well. Insert your key and turn it. The lock should operate smoothly without any resistance.
- Try a Wire Brush: If you’re still encountering resistance after applying rust remover, a wire brush can be an effective tool for dislodging stubborn rust. Be sure to don the appropriate safety gear, like gloves and goggles, before you begin.
- Consider a Vinegar Soak: For extremely rusted locks, a vinegar soak can work miracles. Remove the lock and immerse it in vinegar for 24-48 hours. The acetic acid in vinegar reacts with rust and helps dissolve it. After soaking, scrub gently with a toothbrush, then rinse and dry the lock thoroughly.
- Use of Professional Rust Removal Products: If all else fails, consider using a professional rust removal product. These are specially designed to tackle severe rust, and they offer a powerful solution when other methods fail.
Remember, prevention is always the best cure. Regular maintenance and proper care can prevent rust formation and save you a lot of time and hassle in the future.
Issue 12: Addressing Problems with Incorrectly Installed Door Locks
An improperly installed door lock can cause a multitude of problems and can often be the root cause of your lock malfunction. But don’t worry, identifying and correcting these issues isn’t as daunting as it sounds. I’ll guide you through the process:
- Detect the Issue: If you notice the lock performing erratically—sometimes it works, sometimes it doesn’t—or if the key doesn’t fit correctly, these could be signs of a faulty installation. Another clue is if the lock and latch aren’t aligning properly.
- Prepare Your Tools: You’ll need a few tools to rectify this problem. A screwdriver for adjusting the lock and latch, a measuring tape to check alignments, and possibly a new lock if your current one has been damaged due to incorrect installation.
- Implement the Fix: Begin by loosening the screws of the lock and repositioning it for proper alignment with the latch. Use your measuring tape to ensure accurate placement. If this fails to resolve the issue, it might be necessary to replace the lock entirely.
- Test Your Solution: Now that you’ve made adjustments or installed a new lock, it’s time to test it out. The lock should operate smoothly and the key should fit perfectly with no resistance.
Issue 13: Dealing with Worn-Out Tumblers
Prolonged usage can cause wear and tear on the pins in your tumbler lock, leading to misalignment that prevents the lock from opening. While it might sound complex, this is a common issue that can be addressed with a few steps. Here’s a straightforward guide to help you tackle this problem:
- Identify the Problem: If your lock is becoming progressively harder to open or if it’s refusing to open at all despite using the right key, worn-out tumblers could be the issue. This is particularly common in older locks or those in heavy use.
- Equip Yourself: To fix this issue, you’ll need a lock pick set (only if you’re trained in lock picking, otherwise, consider hiring a professional) and a replacement lock just in case the existing one is beyond repair.
- Implement the Solution: Use the lock pick set to align the worn-out tumblers. If this fails to resolve the issue or if you’re uncomfortable picking the lock, a lock replacement might be necessary.
- Test Your Solution: After realigning the tumblers or replacing the lock, try turning your key. The lock should operate smoothly without any resistance.
Worn-out tumblers can be a hassle, but understanding the mechanics behind the problem can help set the stage for an effective solution.
The tumblers or pins in a lock are crucial components of its mechanism. They align perfectly with the serrations on your key when it’s inserted into the lock, allowing the cylinder to rotate and the lock to open.
Over time, however, these tumblers can wear down or become misaligned due to frequent use, making it difficult for the key to align properly and turn the lock. In some cases, the lock might refuse to open at all, even with the correct key.
In situations where the tumblers are severely worn out or damaged, the best course of action is usually to replace the lock entirely. However, less severe cases can often be remedied by realigning the tumblers, either by a skilled DIYer with the appropriate tools or a professional locksmith.
This is achieved using a lock pick set to manipulate the tumblers back into their proper positions.
While fixing worn-out tumblers can provide a temporary solution, it’s important to realize that a lock with worn tumblers has reached the end of its life cycle. Even after realignment, the tumblers will continue to wear down and the problem will likely recur.
Regular maintenance can delay this wearing process, but ultimately, a lock replacement will be necessary for long-term security.
Frequently Asked Questions (FAQs)
Q1: Can I fix a door lock myself?
Yes, many common door lock issues can be fixed with a few simple tools and a little know-how. However, some issues may require professional help, especially if they involve complex mechanisms or security concerns.
Q2: When should I replace my door lock instead of fixing it?
Door locks should typically be replaced if they are severely worn, if the key breaks off inside the lock and cannot be removed if the lock itself is broken, or if you have recently moved into a new home and want to ensure your security.
Q3: How often should I maintain my door locks?
It’s a good practice to inspect and maintain your door locks once a year to keep them working smoothly. This includes cleaning, lubricating, and tightening any loose screws.
Q4: What do I do if I’m locked out of my house?
If you’re locked out, you can try picking the lock yourself if you feel confident in doing so. Alternatively, you may want to call a professional locksmith. Lastly, if you have a spare key accessible, such as with a trusted neighbor, you could use it to gain entry.
Q5: What types of locks are most secure for my home?
Deadbolts are often recommended for home security due to their durability and strength. However, high-security lock brands such as Medeco, Mul-T-Lock, and Assa Abloy are also great choices.
Q6: How do I prevent my door locks from freezing in the winter?
You can prevent your lock from freezing by applying a lock de-icer or graphite lubricant, which will repel moisture and reduce the risk of freezing.
Q7: What should I do if the key keeps turning in the lock, but the door won’t open?
This could be an indication of a broken tailpiece, a problem with the internal mechanism, or an issue with the key itself. If simple troubleshooting doesn’t solve the issue, you may need to consult with a locksmith.
Final Thoughts and Recommendations
When it comes to household maintenance, door locks often get overlooked until a problem arises. The reality is, that ensuring the smooth operation of your locks can not only save you from unexpected lockouts but also significantly enhance the security of your home. Remember, routine checks and preventive maintenance go a long way in preserving the longevity of your locks. Try to identify and address issues early on to prevent them from escalating into larger, more complicated problems.
Over time, you may encounter various challenges such as rust formation, incorrect lock installation, or worn-out tumblers—each of these problems is fixable with a bit of knowledge and the right tools. The solutions provided in this guide are designed to be practical and easy to follow for the everyday homeowner.
Ultimately, door locks are an integral part of your home’s security system. Its maintenance and care should be a priority. So, explore these tips, apply these solutions, and enjoy a more secure home.

I’m J.S., I created and am the content manager at DIYHouseSkills.com. I do the research and write the articles that appear on this website. I’ve learned many household skills during my life and think it’s important to at least know the basics so that you can save yourself time and money… READ FULL BIO >
Read Other Maintenance Articles:
- DIY Secrets: Finding and Using the Bosch Ice Maker Reset Button
- Say Goodbye to Stubborn Stains on Stainless Steel Pots
- Effortlessly Remove Mold From Tile Grout with These Easy Steps
- Proven Strategies to Unclog Your Kitchen Sink Efficiently
- Outlet Not Working, Breaker Not Tripped | Advice
- How to Repair a Sage Coffee Machine
- Change Your Bathroom Sink Faucet The Easy Way
- Your Guide to DIY Door Handle Replacement
