
Today, I’ll share my insights and guide you through selecting the best sealants for every project around your home—from the kitchen and bathroom to windows and exterior spaces.
By the end of this guide, you’ll be equipped with professional knowledge to make informed decisions and wield sealants like a pro.
- Kitchens: Food-Safe Silicone Sealant
- Bathrooms: Mold-Resistant Sealant
- Windows: Weather-Resistant Silicone
- Exteriors: Polyurethane Sealant
- Understanding Sealant Types
- Comparative Sealant Analysis: Pros and Cons
- FAQs
- Actionable Steps for Sealant Success:
- Bonus Tips:
- Decision-Making Tool for DIY Novices
- Navigating the Sea of Sealants
Kitchens: Food-Safe Silicone Sealant
When it comes to kitchen projects, safety and durability should never be compromised. I recommend a food-safe silicone sealant for sealing any surfaces that might come into contact with food, such as countertops and around sinks.
- Countertops & Backsplashes: Silicone reigns supreme here! Its water resistance and flexibility prevent leaks and withstand cleaning chemicals. Pro tip: Choose a mold-resistant formula for extra protection.
- Sinks: Silicone wins again for its long-lasting seal around fixtures and preventing water damage. Opt for a sanitary formula for added germ protection.
- Tile Surrounds: Silicone remains your best bet due to its ability to handle moisture and movement. Consider a tub & tile sealant for a smoother finish.
- Floors: Polyurethane shines for its crack-filling capabilities and ability to withstand heavy traffic. Choose a self-leveling formula for uneven surfaces.
What Makes It Special?
- Safe for Direct Contact: Certified for use where it matters most, ensuring your family’s health is always a top priority.
- Highly Durable: Resists heat and harsh cleaning agents, making it a long-lasting ally in your kitchen.
Application Tips:
- Clean Surfaces Thoroughly: Ensure no residues or moisture that could affect adhesion.
- Apply Evenly and Smoothly: Use a steady hand and tool the sealant with a damp cloth for a clean finish.
Bathrooms: Mold-Resistant Sealant
Bathrooms endure constant moisture and rigorous cleaning routines, making mold-resistant sealant your best defense against mildew and deterioration.
Why It’s a Must-Have:
- Mold and Mildew Resistance: Provides long-lasting protection in the wettest conditions.
- Easy Maintenance: Stands up to frequent cleaning without losing its integrity.
Perfecting Your Application:
- Ensure a Dry Area: Wait until tiles and fixtures are completely dry before application.
- Precision is Key: Use masking tape for neat lines, especially in visible areas.
Pro tip: Choose a mold-resistant formula for extra protection. Can You Caulk Over Grout? Dos and Don’ts
Windows: Weather-Resistant Silicone
For windows, the clear choice is a weather-resistant silicone-based sealant. It not only seals drafts but also contributes to energy efficiency by maintaining indoor temperatures.
The Clear Advantages:
- Weatherproof: Resists rain, snow, and temperature changes with ease.
- Energy Efficient: Helps keep cold drafts out and warm air in, lowering energy bills.
Installation Mastery:
- Focus on Gaps: Identify and fill all potential air leaks for maximum efficiency.
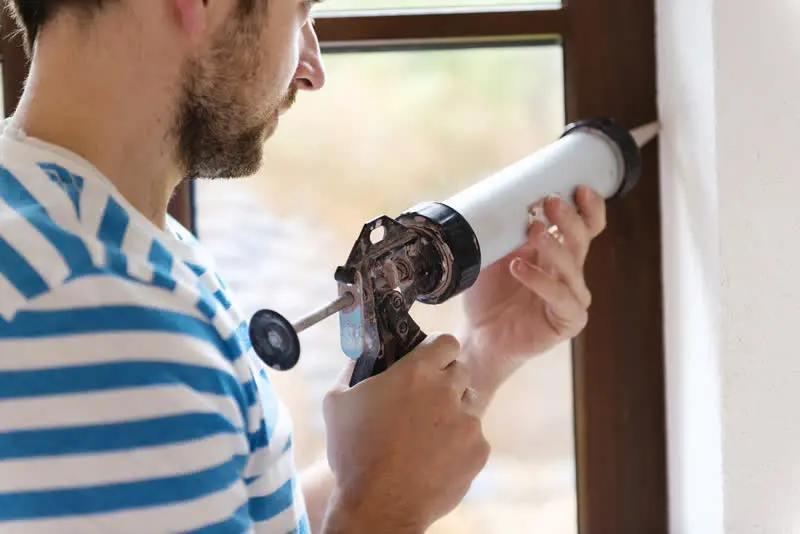
- Smooth Application: A caulking gun and a steady hand guarantee a sleek, invisible seal.
Exteriors: Polyurethane Sealant
The great outdoors demands a high-performance polyurethane sealant. Equipped with UV protection, it’s the stalwart choice for projects exposed to the elements.
Standout Features:
- UV Protection: Ensures longevity and prevents cracking or fading.
- Versatility: Binds to virtually any construction material with superior strength.
How to Apply Like a Pro:
- Surface Prep: Clean and dry all surfaces for the best adhesion.
- Uniform Application: Use a steady pressure to apply and make sure to fill joints and cracks thoroughly.
Understanding Sealant Types
Before diving into specific applications, let’s explore the different types of sealants:
- Silicone: The king of sealants, renowned for its flexibility, water resistance, and durability. Ideal for kitchens, bathrooms, windows, and exterior applications.
- Acrylic: Water-based, easy to use and paint over, but less flexible and water-resistant than silicone. Suitable for interior applications like trim, baseboards, and non-critical sealing.
- Polyurethane: Strong, flexible, and paintable, but requires proper ventilation and can be messy. Great for high-movement joints like expansion joints and concrete cracks.
- Hybrid: Combines properties of different types, offering flexibility and paintability. Popular for general-purpose sealing around windows, doors, and countertops.
- Specialty sealants: Designed for specific applications, like roof sealants, fire-resistant sealants, and marine-grade sealants. Choose based on your specific project needs.
Comparative Sealant Analysis: Pros and Cons
Each recommended sealant shines in its specific application, yet it’s crucial to acknowledge its limitations for a holistic view.
- Food-Safe Silicone: While unparalleled in safety and durability for kitchen use, it may fall short in mold resistance compared to specialized bathroom options.
- Mold-Resistant Bathroom Sealant: Its supreme resistance is a boon, yet precision in application is vital to prevent future issues.
- Clear, Weather-Resistant Silicone: Ideal for visibility and draft prevention, but longevity under extreme conditions may not match polyurethane’s robustness.
- High-Performance Polyurethane: Offers unmatched weather resistance and versatility, albeit the application can be challenging, and it may not adhere well to all surfaces.

FAQs
This FAQ section tackles common questions DIY beginners have about sealants, empowering you to tackle those home improvement projects with confidence.
Q: Which sealant is the best for everything?
A: Unfortunately, there’s no one-size-fits-all answer! Different sealants excel in different applications. This article guides you through choosing the right type based on your specific project (kitchen, bathroom, windows, etc.).
Q: I’m a complete beginner. Is applying sealant difficult?
A: Not at all! With the right preparation and technique, anyone can achieve a professional-looking seal. This article provides step-by-step instructions and helpful tips to make the process smooth and easy.
Q: Do I need fancy tools to apply sealant?
A: A basic caulking gun is all you need for most projects. You can find them at most hardware stores for affordable prices.
Q: What if I make a mistake while applying sealant?
A: Don’t panic! As long as the sealant hasn’t cured yet, you can usually wipe it away with a damp cloth and start over. For fully cured sealant, options like mineral spirits or a sealant removal tool might be needed.
Q: How long does sealant last?
A: This depends on the type of sealant and the application. Most high-quality silicone sealants can last for several years with proper application and maintenance.
Q: I’m worried about using harsh chemicals. Are there eco-friendly sealants available?
A: Absolutely! Look for sealants labelled “low-VOC” or “eco-friendly,” which offer similar performance with reduced environmental impact.
Q: Where can I find more information about specific sealant products?
A: This article mentions popular sealant types, but for specific product details and recommendations, check the manufacturer’s website or consult with a professional at your local hardware store.
Actionable Steps for Sealant Success:
Now that you’ve chosen the right sealant, here are some key steps for a successful application:
- Surface Preparation: Clean the surface thoroughly with a damp cloth and degreaser. Ensure it’s dry and free of dust before applying sealant.
- Masking: Use painter’s tape to create clean lines around the area to be sealed.
- Cutting the Nozzle: Cut the nozzle tip at an angle slightly wider than the desired bead size.
- Applying the Sealant: Apply the sealant steadily with a caulking gun, ensuring good contact with the surface.
- Tooling: Use a wet finger or a sealant smoothing tool to create a smooth and even finish.
- Drying & Curing: Allow the sealant to dry completely according to the manufacturer’s instructions. Don’t touch or expose to water during this time.
- Removing Tape: Carefully remove the painter’s tape once the sealant has skinned over.
Bonus Tips:
- For large projects, consider using a caulk gun with a ratchet mechanism for easier application.
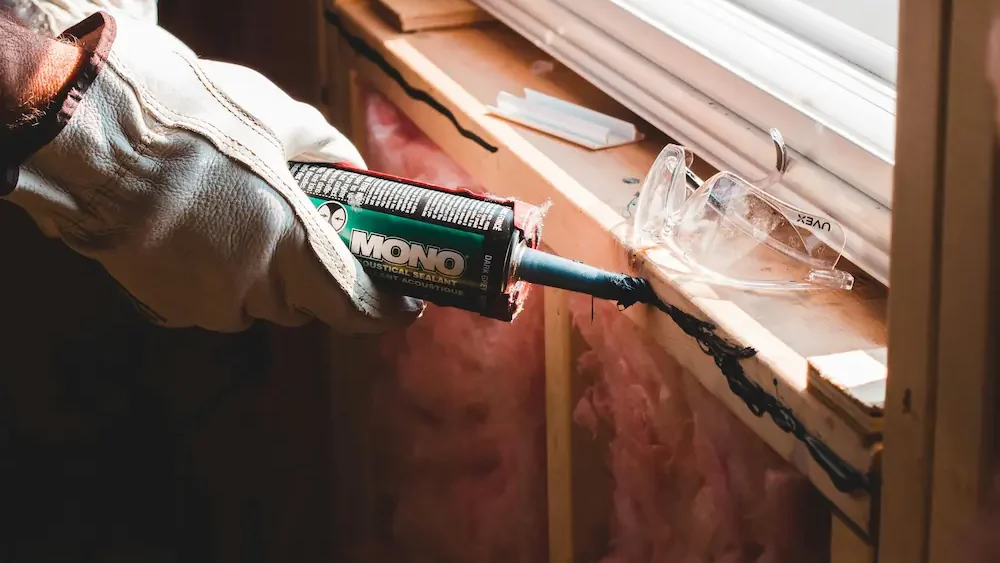
- Wear gloves and safety glasses when handling sealants, especially if using solvent-based ones.
- Store leftover sealant in a cool, dry place with the nozzle capped tightly.
- Test the sealant on an inconspicuous area before applying it to the entire surface.
- Always read the manufacturer’s instructions carefully for specific application details and curing times.
Decision-Making Tool for DIY Novices
This table helps you choose the ideal sealant for your project, even if you’re a complete beginner! Simply answer the questions and find the corresponding sealant type recommended for your needs.
Remember, this is a general guide, and always consult product labels and manufacturer instructions for specific details.
(Kitchen/Bathroom):
| What material are you sealing? | What level of flexibility is needed? | Recommended Sealant |
|---|---|---|
| Ceramic tile, porcelain | Moderate flexibility | Silicone |
| Acrylic countertops | High flexibility | Silicone |
| Tub & shower surrounds | High flexibility, mold-resistant | Silicone (tub & tile formula) |
| Grout lines | Flexible, paintable | Acrylic or hybrid |
(Windows & Doors):
| What material are you sealing? | Is there significant movement (expansion/contraction)? | Recommended Sealant |
|---|---|---|
| Wood frames | Moderate movement | Silicone or hybrid |
| Vinyl frames | Low movement | Silicone or acrylic |
| Drafty gaps | Large gaps | Polyurethane |
(Exterior):
| What material are you sealing? | Is the area exposed to harsh weather? | Recommended Sealant |
|---|---|---|
| Roof shingles | Durable, weatherproof | Specialty roof sealant |
| Siding (wood, vinyl) | Flexible, weatherproof | Silicone or hybrid |
| Driveway cracks | Flexible, crack-filling | Polyurethane (self-leveling formula) |
Additional Tips:
- For color options, choose a paintable sealant if needed.
- For mold and mildew resistance, opt for a formula with specific protection.
- For ease of use, consider water-based acrylic sealants (but they might be less durable).
- Always read product labels and manufacturer instructions carefully for specific applications and limitations.
Navigating the Sea of Sealants
Choosing the right sealant may seem daunting at first glance. Yet, armed with knowledge and insights from countless successful (and some less so) projects, I assure you that mastering this aspect of home improvement is within reach.
Remember, every project is unique, and while guidelines provide a solid foundation, there’s always room for creativity and adjustment based on your specific circumstances. Whether sealing a kitchen backsplash or weatherproofing an exterior deck, the right sealant and application technique will elevate your DIY project from good to great.
- Washer Won’t Drain Water – How to Troubleshoot and Fix
- Washing Machine Shakes or Bounces -Here’s How to Solve It
- Eufy Scale Troubleshooting | How To Fix
- Flushing Water Heater Sediment Like a Pro: The Homeowner’s Handbook
- Delta Touch Faucet Not Working? Here’s What to Do!

I’m J.S., I created and am the content manager at DIYHouseSkills.com. I do the research and write the articles that appear on this website. I’ve learned many household skills during my life and think it’s important to at least know the basics so that you can save yourself time and money… READ FULL BIO >